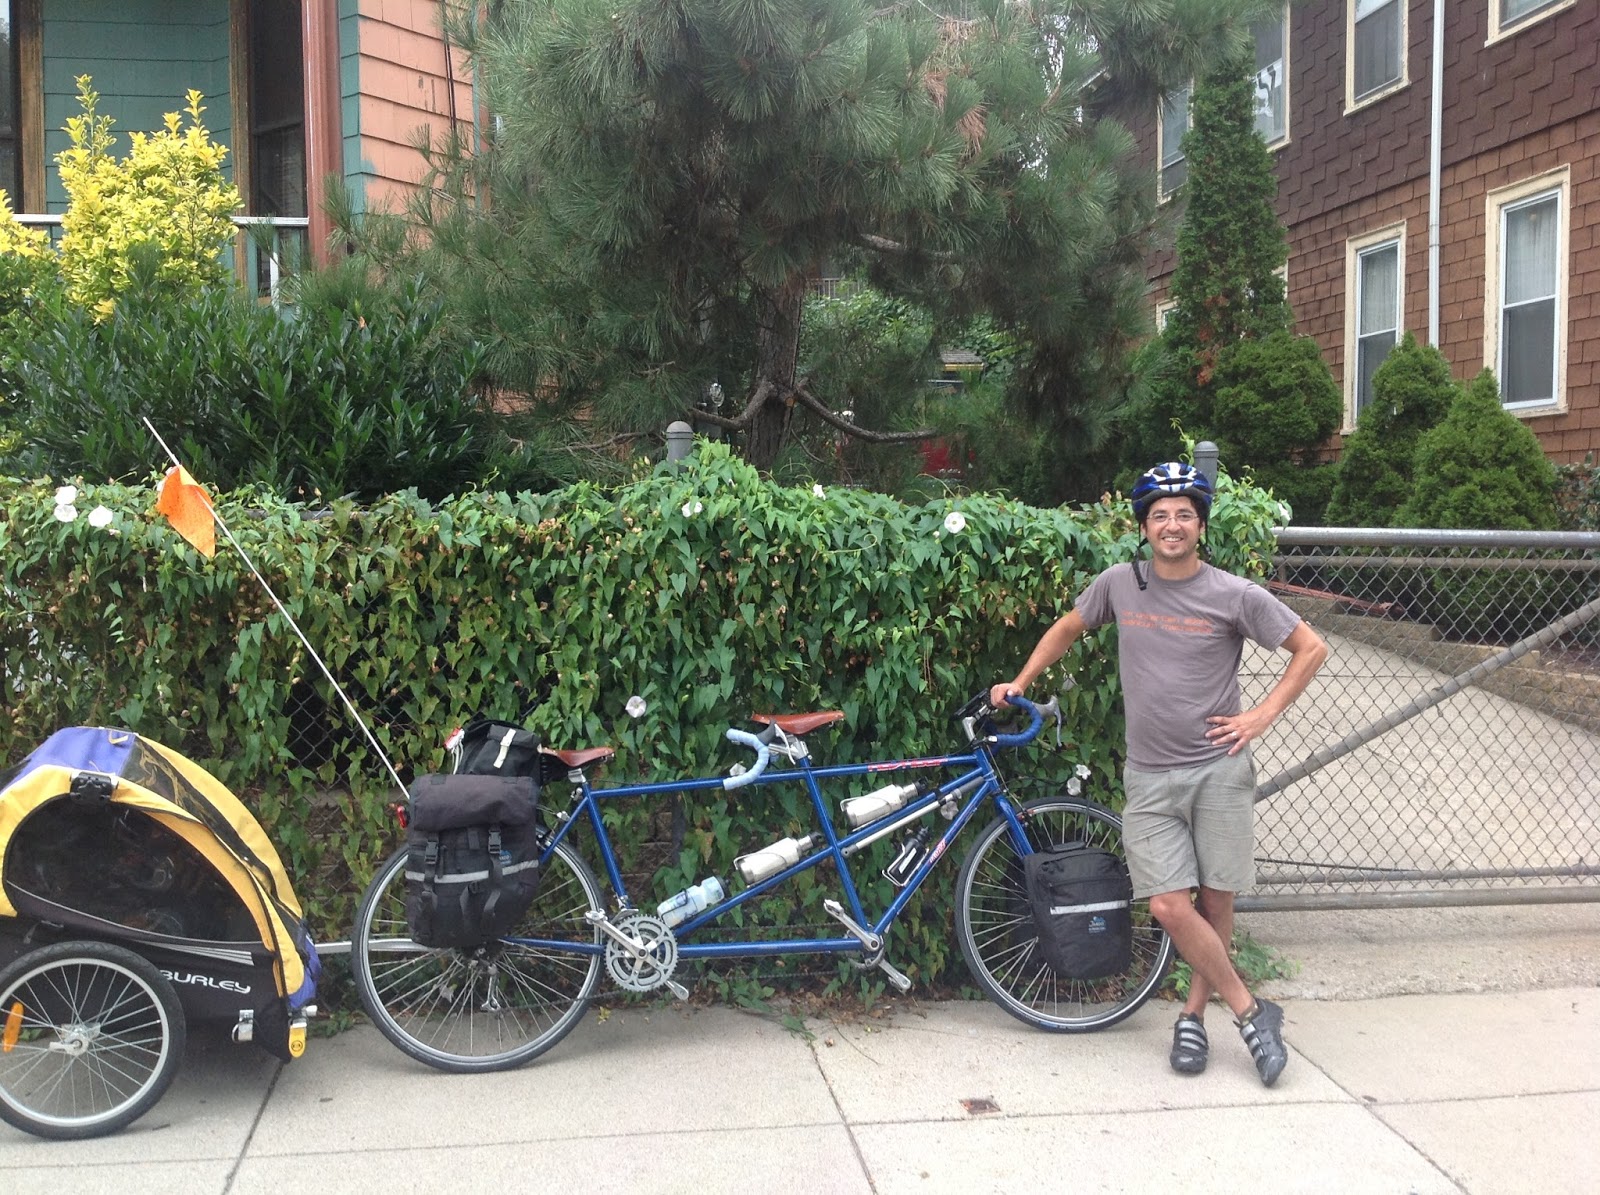
Fast-forward to this past winter.
It's been a long, cold winter in Boston, so anything that can occupy a few hours of indoor time is always in demand. Fortunately I am happy to come home from work and spend an hour or two working on bike projects before dinner (and my wife is kind enough to oblige this indulgence).
So here begins what you've probably come to this post for: the dirty details of what I did to the bike to turn it into one that I could really be excited about.
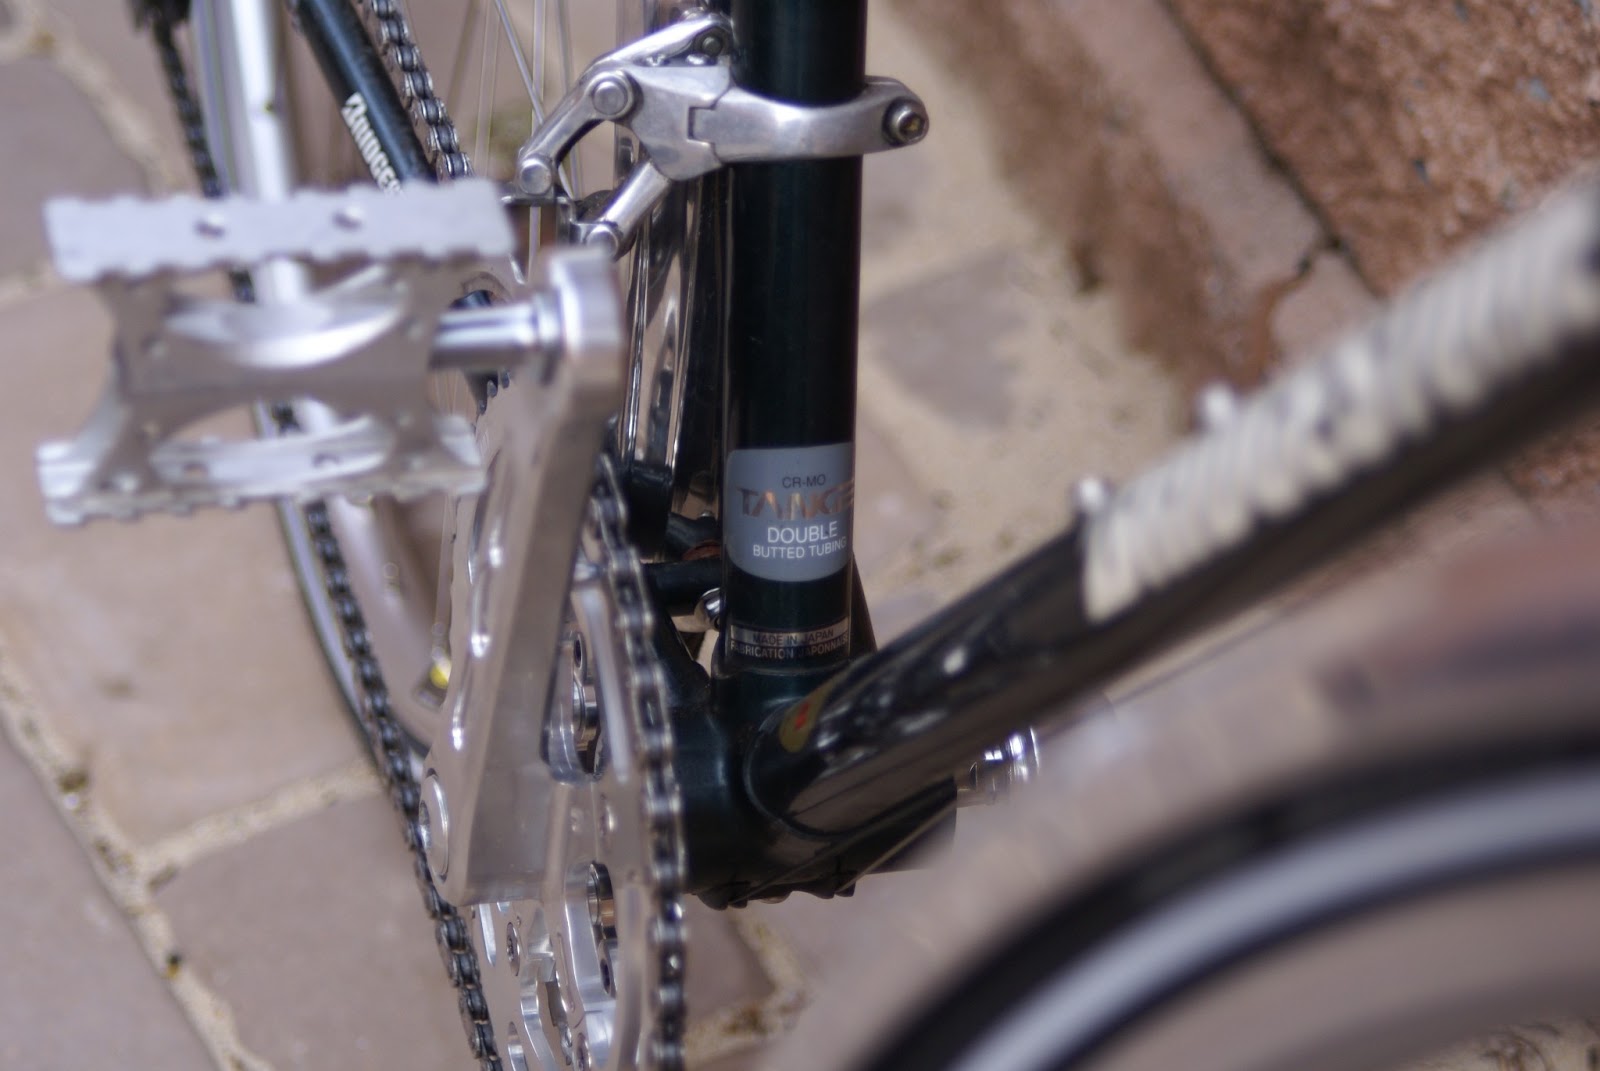
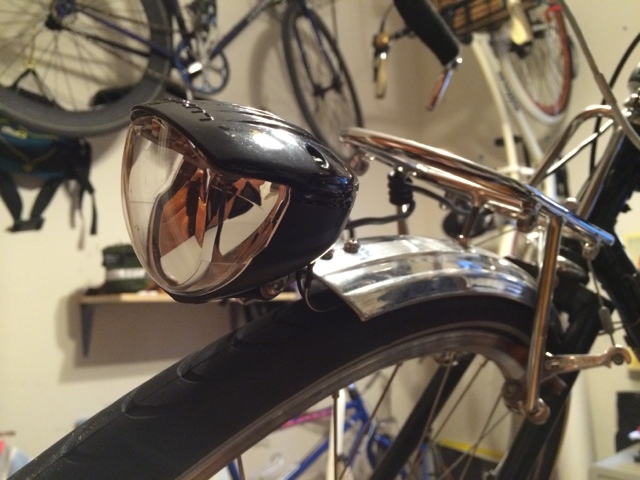
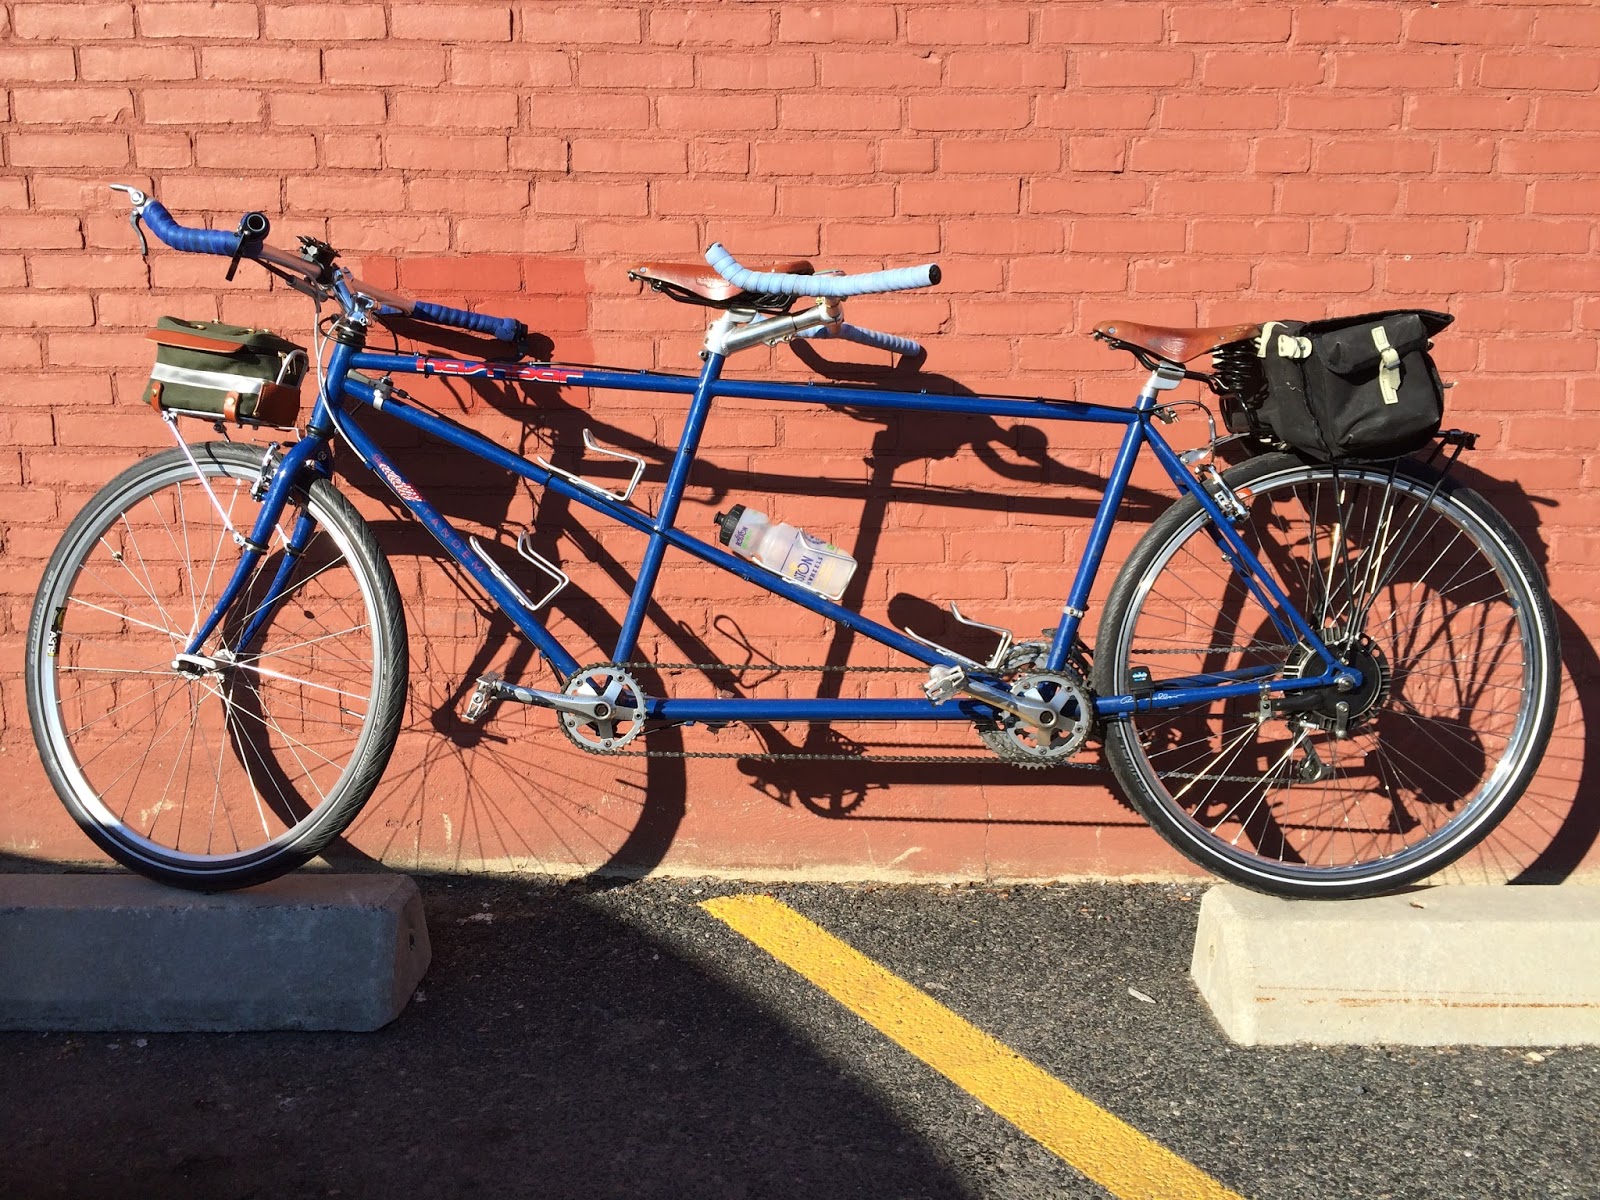
First thing's first: a 27"-700c conversion was necessary. The tire selection for 27" rubber stinks, and I wanted something much juicier than what I could find in imperial dimensions. I've mentioned before my affinity for Schwalbe Marathon Supreme's, and the tandem was the perfect opportunity to put them on in their fattest form: 45c. I don't think it would have been a problem had the bike originally been designed for 700c wheels, but the small decrease from 27"->700c probably made this a tad easier.
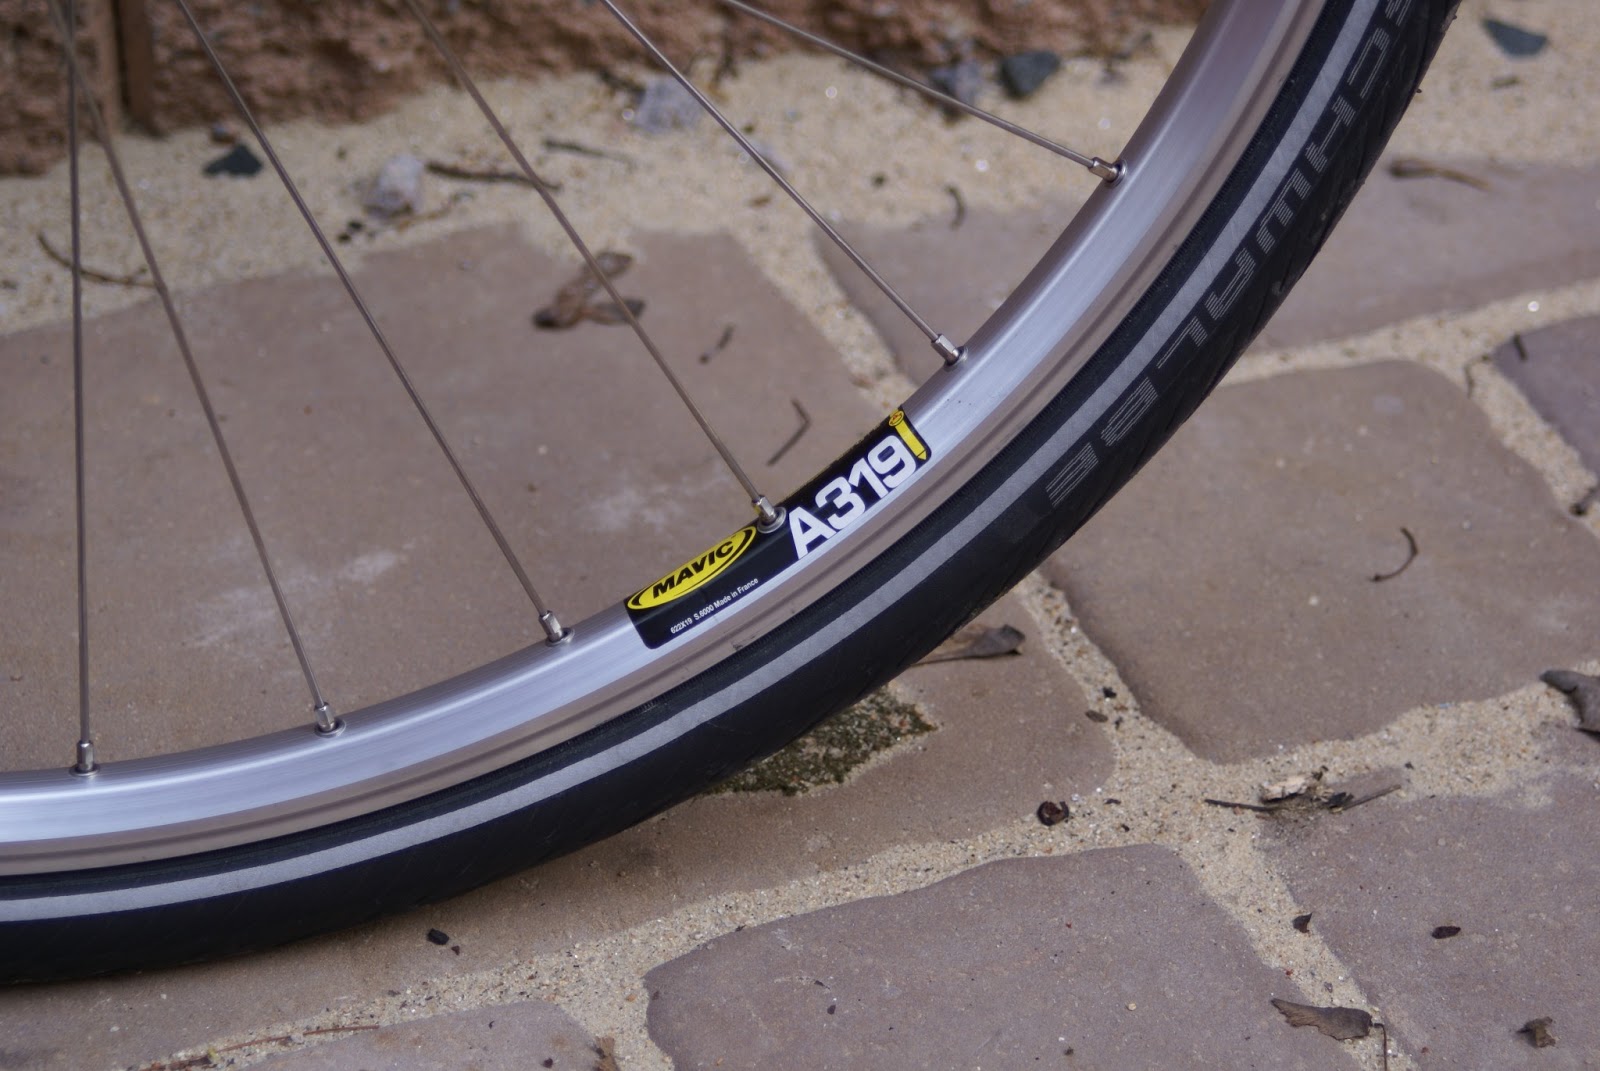
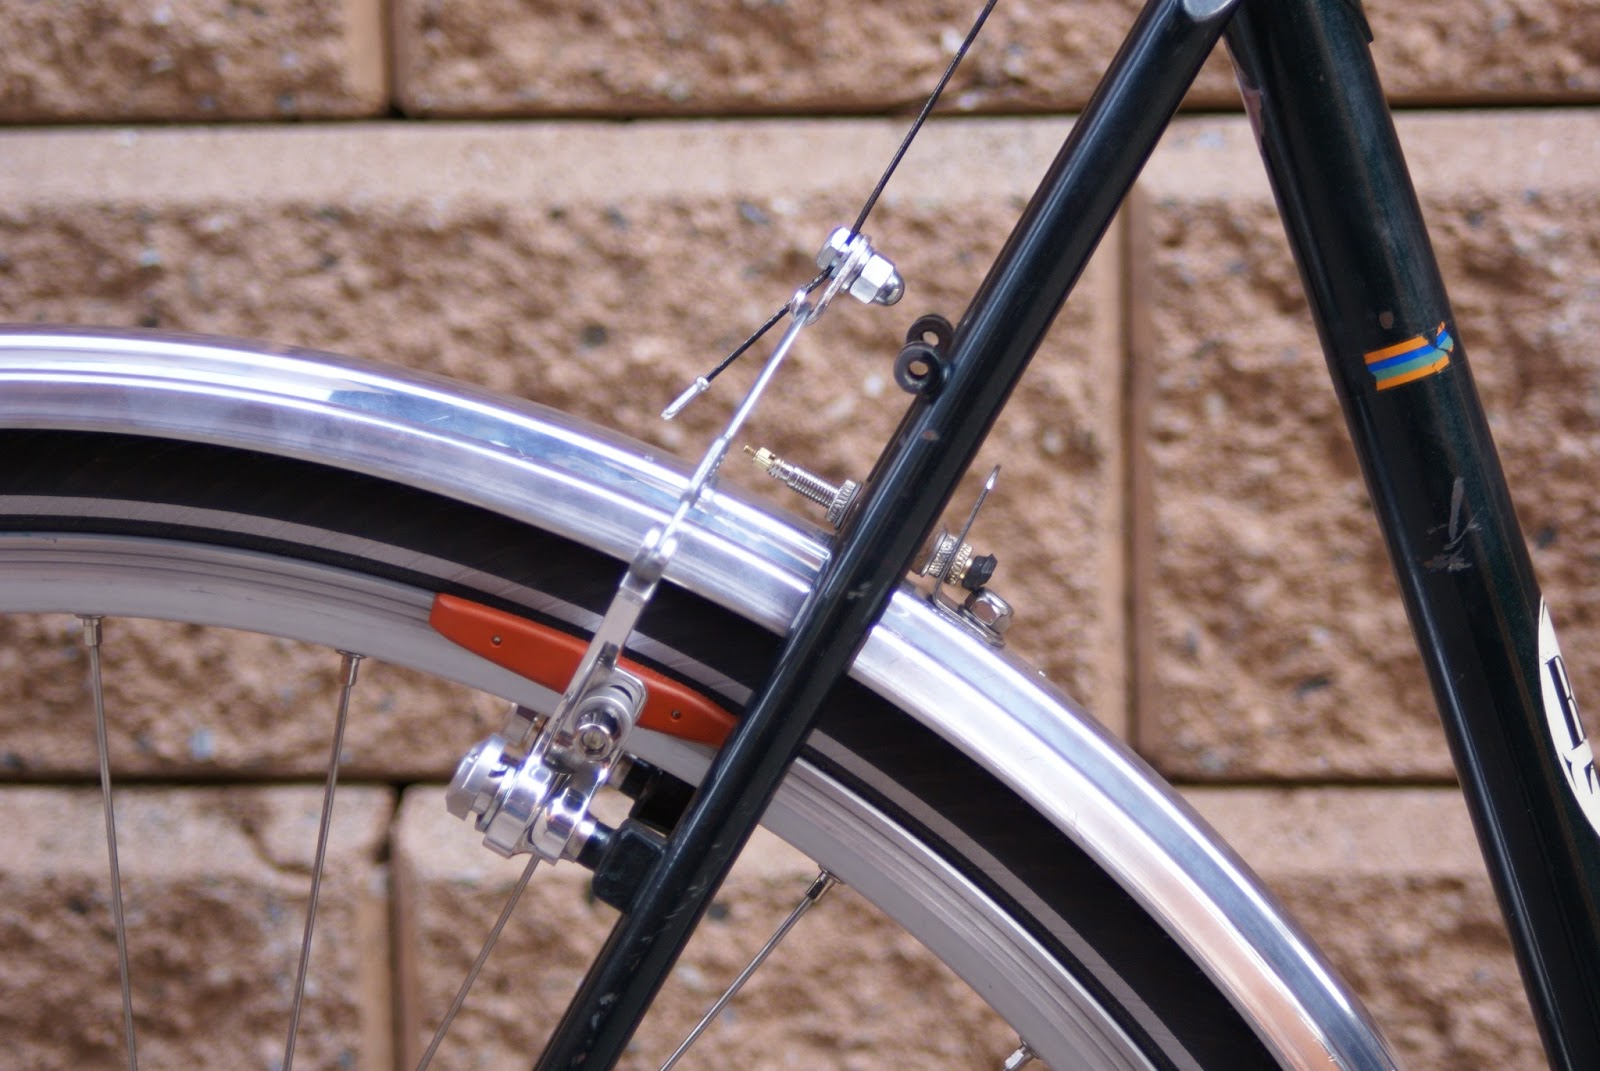
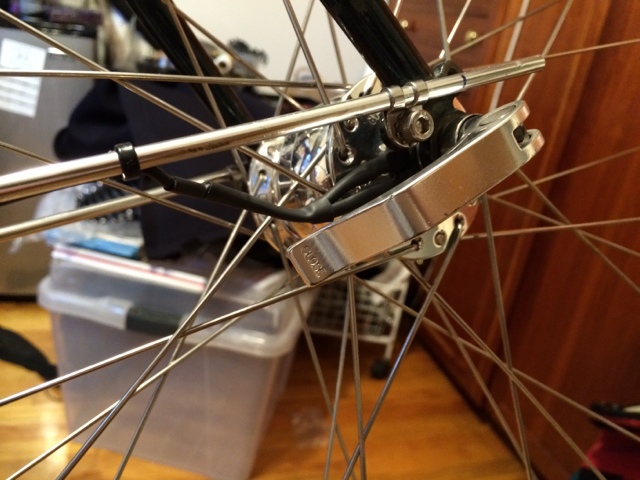
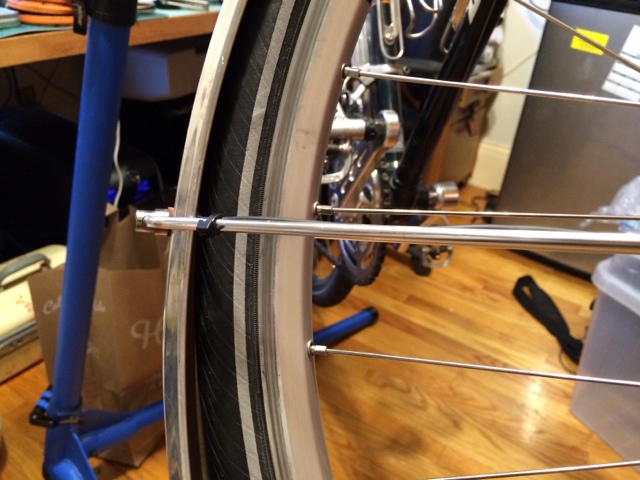
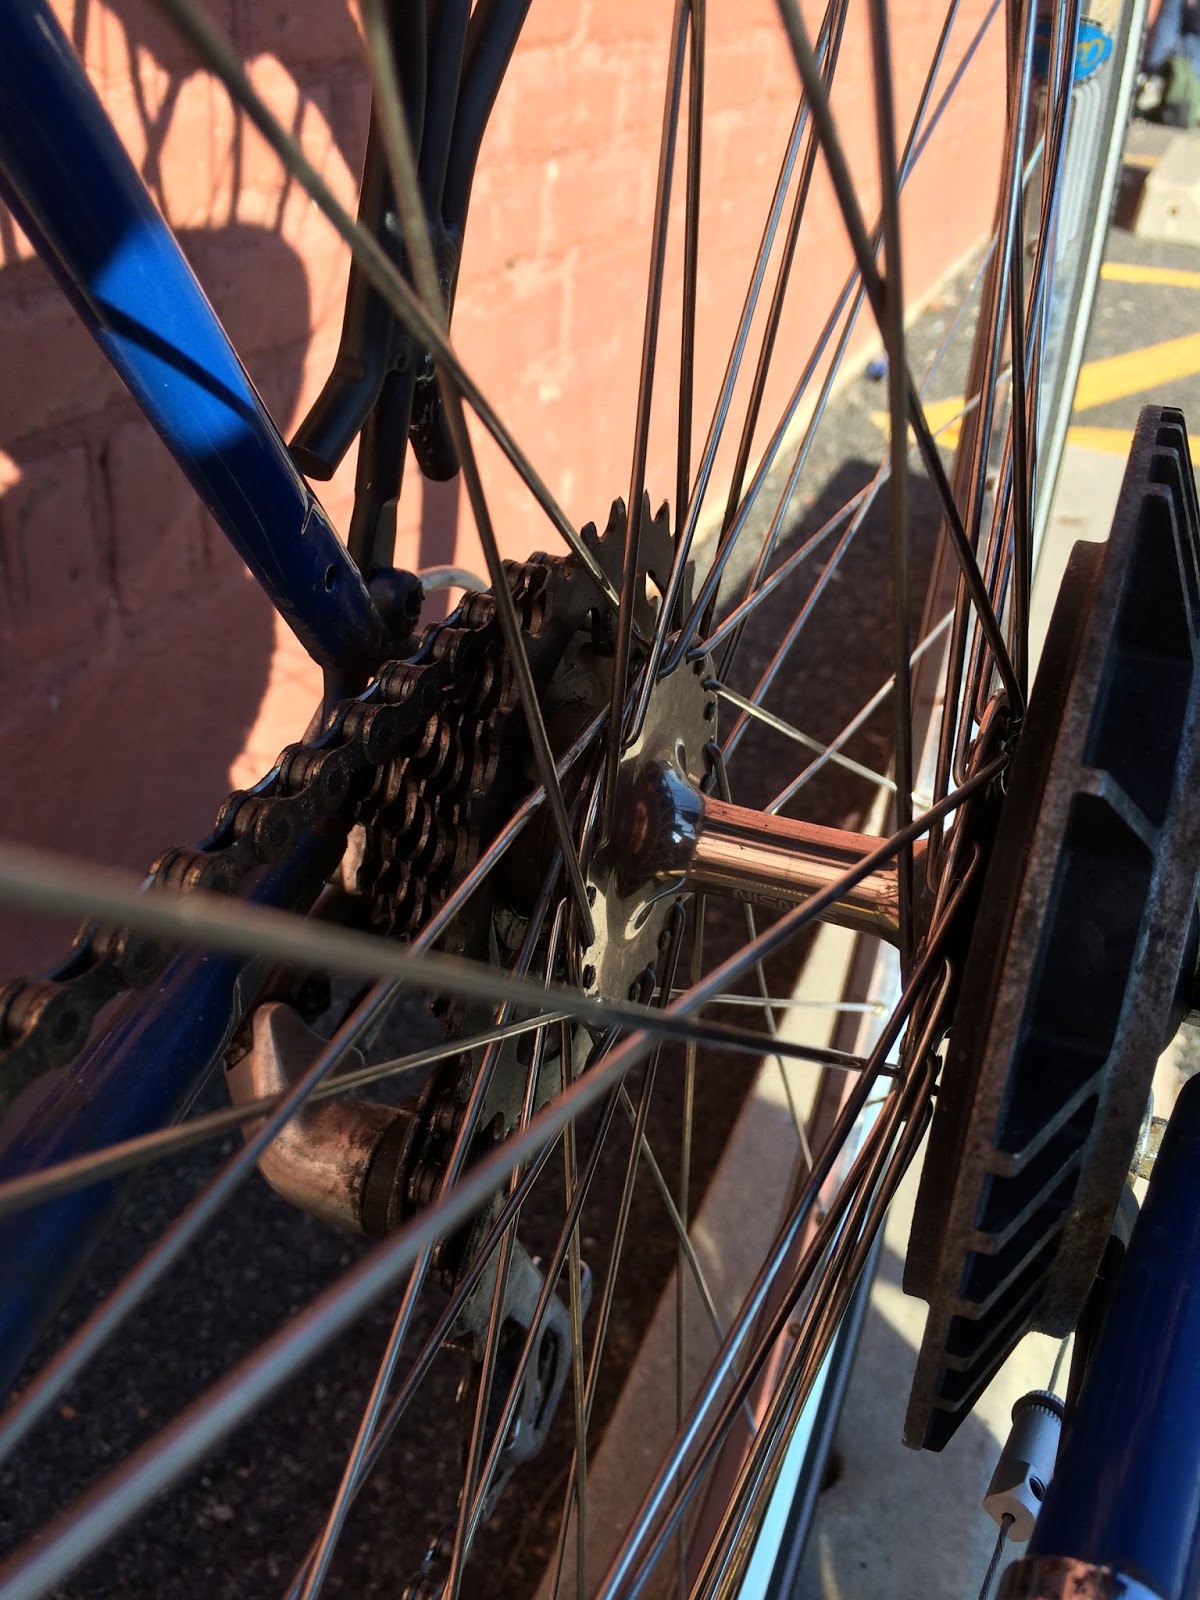
Of course I needed new wheels to match the rubber, so I used this as an opportunity to use my 32-hole Ultegra hub mated to a Mavic A319 rim that was on my Bridgestone RB-T (replacing that with a SON28 on the BStone). I reused the rear hub from the tandem (a sealed bearing 48-hole Sansin designed for the already present Arai drum brake) and asked Elton at Harris Cyclery to build me a new wheel mated to a NMSW Velocity Atlas. Every other reference to "bombproof" wheels in the history of the internet should point to the below pictures:
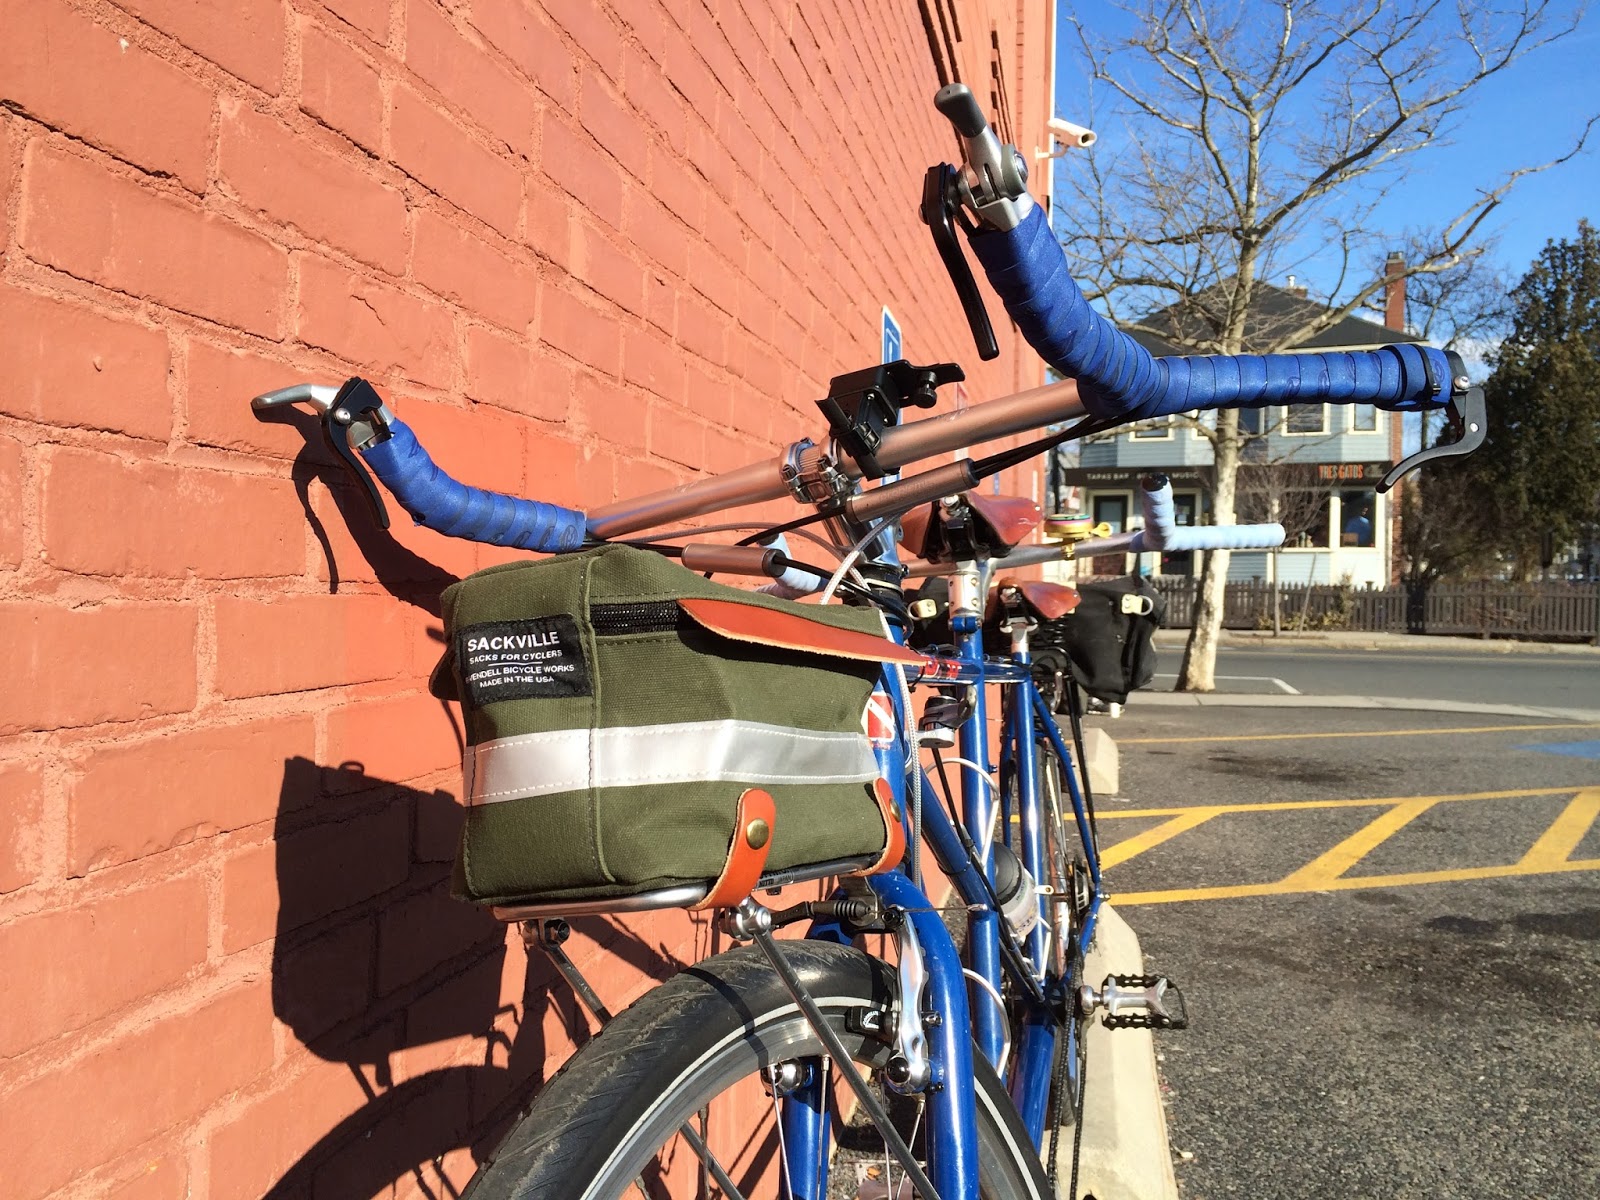
When Velo Orange announced their "Crazy Bars" I immediately decided that I needed two sets of them. I missed out on the first round, but I got in on the second and swapped out both front and rear drops for these very practical (and admittedly bizarre) h'bars.
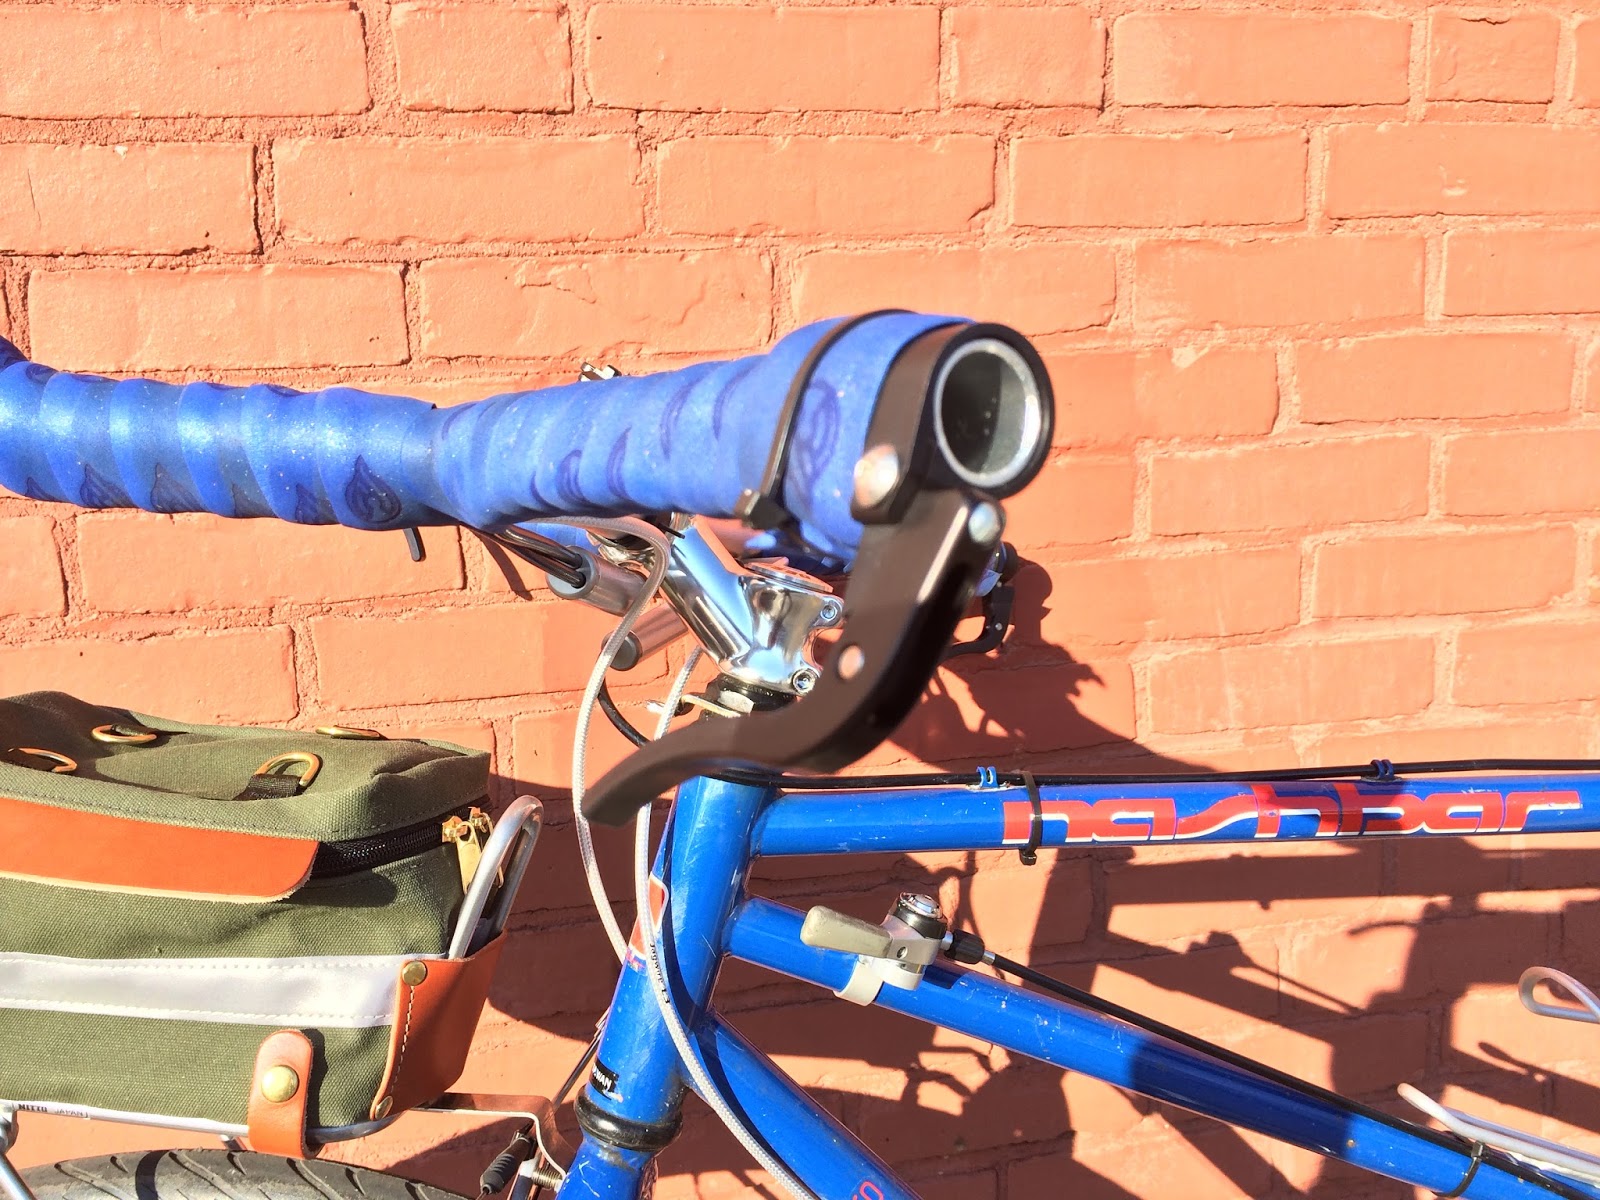
Only problem was that the OEM quill didn't work with bars like these, so I needed to convert to a threadless-type stem. I originally assumed that the stem was a standard 1" quill, but I was mistaken. This steed takes a somewhat unique 1-1/8" quill. Fortunately, Universal Cycles had a 1-1/8" quill to threadless adapter, to which I attached a Profile Design stem:
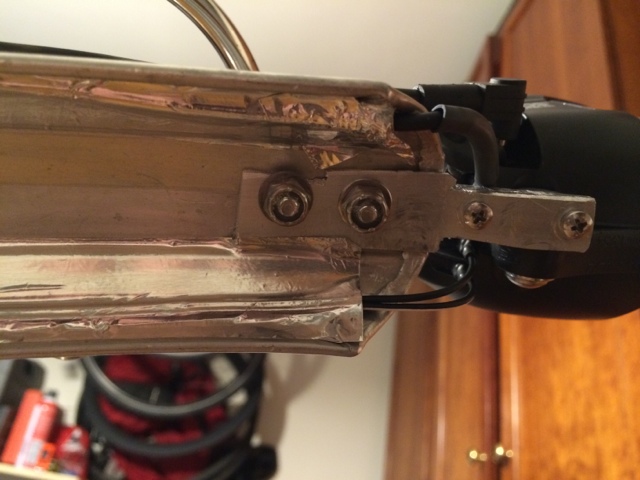
I also took the Nitto rando rack that was previously on my commuter and put it on this bike. All I had to do was buy some fork blade clamps (from Bikes Not Bombs).
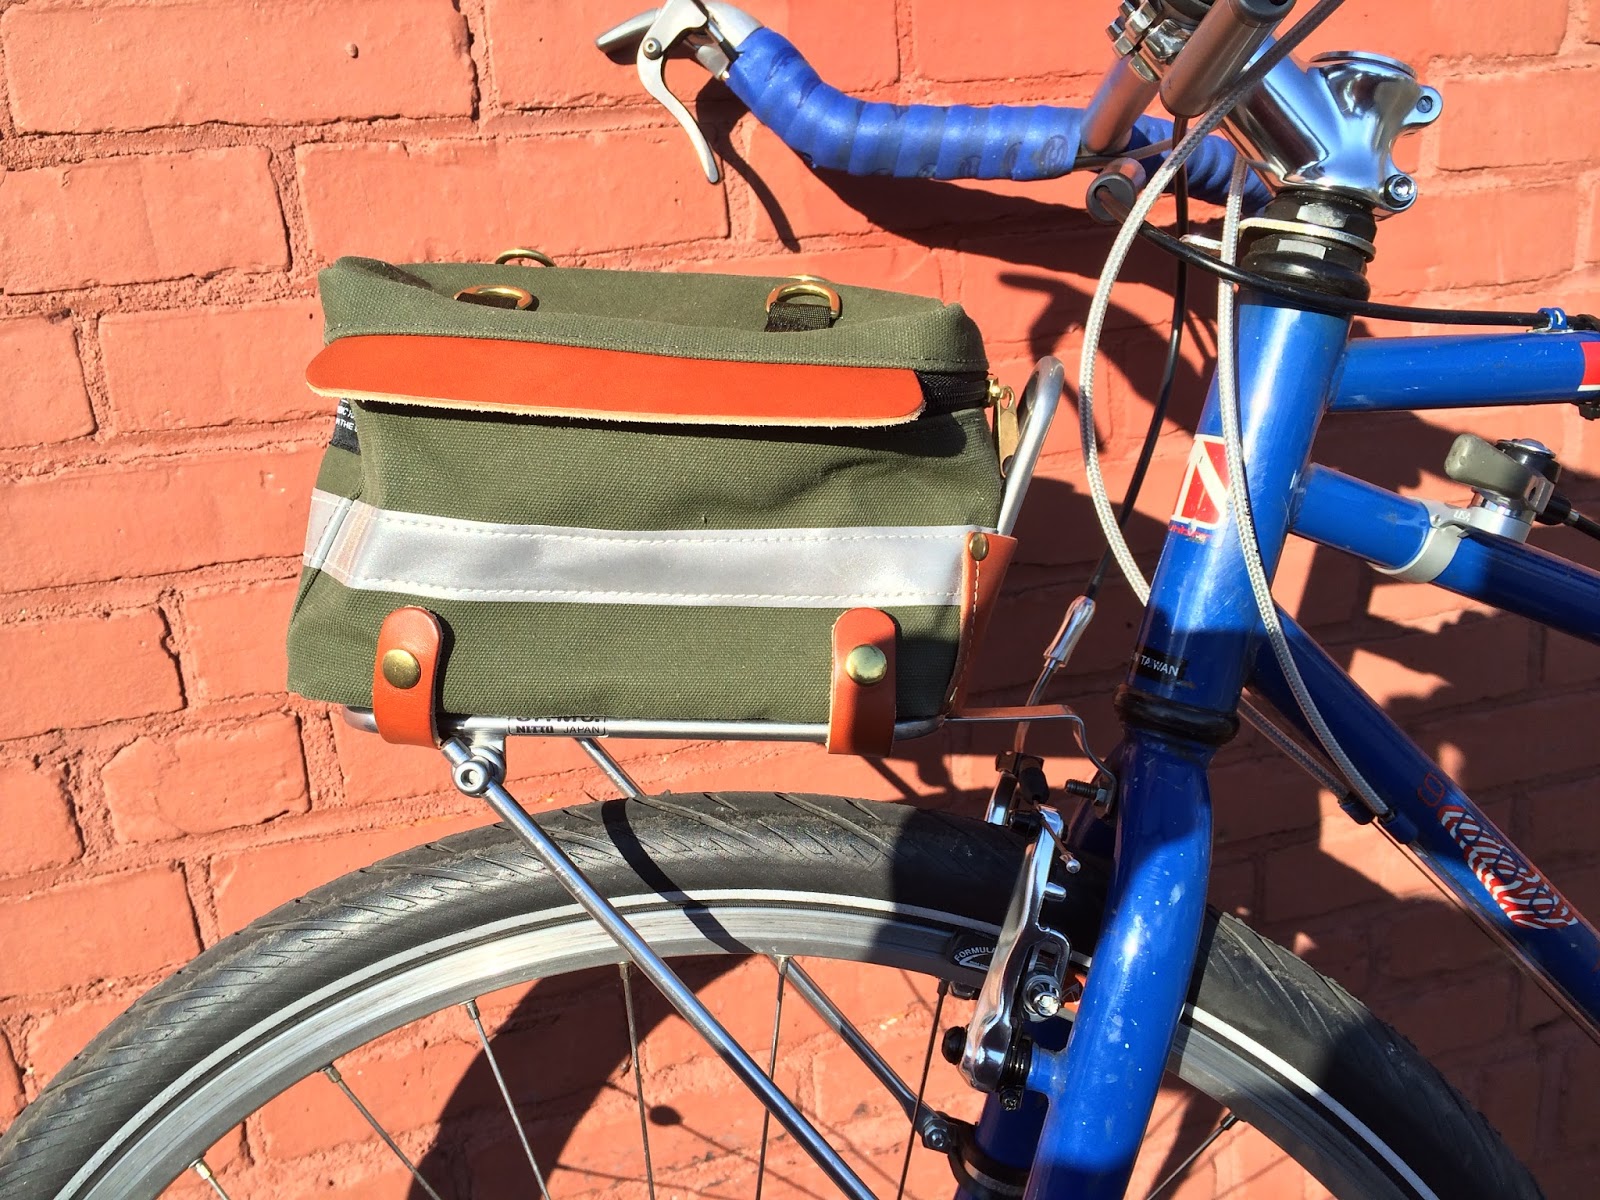 |
| Clamps not actually visible in this picture, but they are elsewhere. That's a Rivendell Trunksack. |
One of the things that attracted me to the Crazy Bars was the ability to brake from multiple positions. Much easier said than done. The bars have a thickness of 22.2mm at the main part and 23.8 in the horns. Therefore, inverse levers won't fit into the upright portion, nor will bar end shifters. Personally I think this is a poor choice on VO's part, but I'm sure they have their reasons. That being said, I had to figure out a solution that would allow me to have two sets of levers with bar end shifters and yet leave the horizontal portion of the bar clean, as I never use that area, other than to house devices like my iPhone mount. After much researching, I settled on the JTek AeroBrake, which attaches to Shimano barcons by replacing the bolt with part of the brake mechanism:

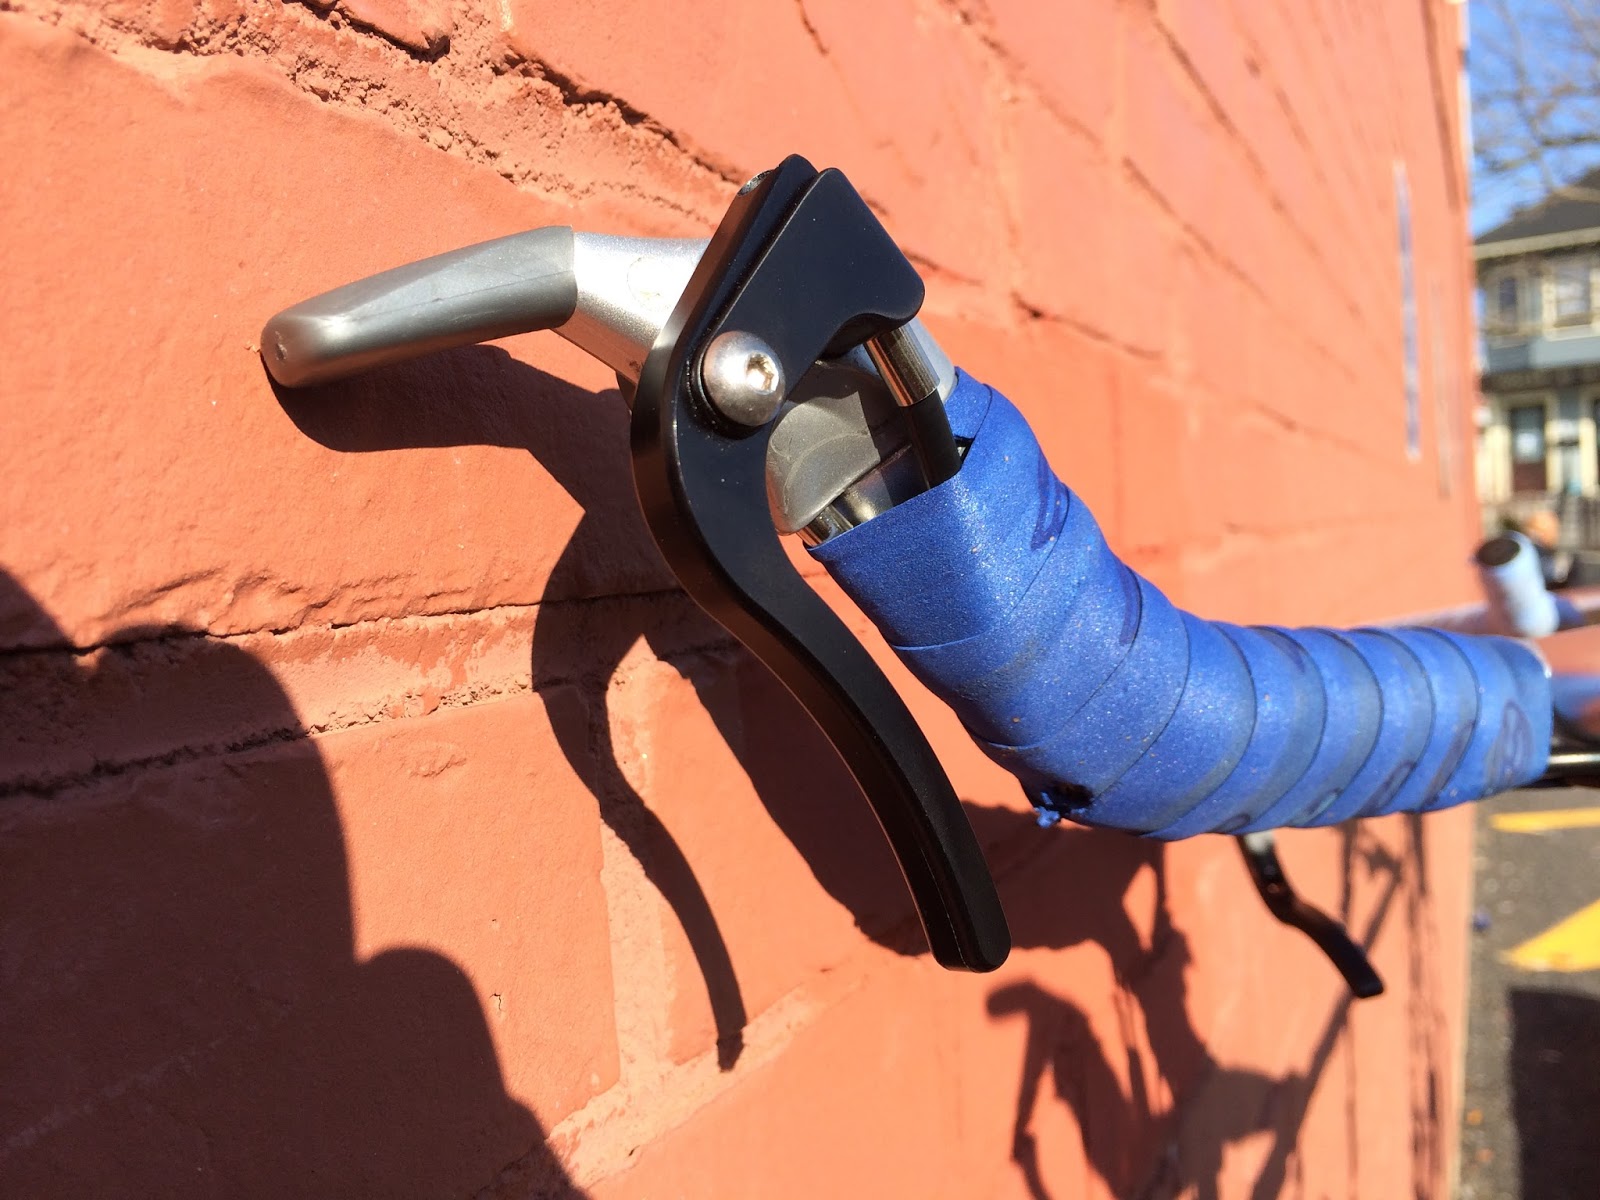

In the upright portion, I went with JTek AeroBrake Clamp-on Style levers, as most typical inverse levers require a larger diameter than the roughly 17.6mm that is present on the VO Crazy Bars. Plus, I figured I might as well keep all the brake levers in the same family and I'm always interested in supporting small-scale American bicycle parts manufacturers:
.JPG) |
| I subsequently got somewhat Bob-ish and finished the cork bar tape with nylon string (not hemp or cotton...) |
Four brake levers and only two brakes (not including the Arai drag/drum brake which we'll get to later). I originally ordered a DoubleControl Model L from JTek engineering as well, but once I received it I decided that I would like to have the integrated spring that is present in the Problem Solvers version of the same device. I also was not very happy with what appeared to be pretty rough tolerances in the JTek version.
 |
| This image is from JTek's website. You can see their DoubleControl just below where the stem would connect. |
I contacted Ryan at JTek and he gladly accepted my return of the DoubleControls and I ordered two Problem Solvers Cable Doublers (in the 2:1 guise that pulls one brake with either of two levers, they also sell a 1:2 variety that allows one lever to pull two brakes). I was very pleased with the quality of these devices, and they have two integral springs that prevents the lever that is not being squeezed from going limp when the other one is pulled. Only thing: they are a supreme pain in the ass to get set up correctly, especially on a tandem where the cable runs are a mile long. I located both of the doublers at the handlebars, so that I would only have to run one cable to the brakes (not as big of a deal for the front, but it certainly was for the rear). It took me three post-work evenings of cursing at these buggers before I got them dialed in.

So far it doesn't appear that I need to cinch the doublers to the bars to prevent rattling, but if I do I'll have to figure out something more elgegant than zip-ties, probably twine and do a similar treatment to the ends of the h'bars.


Because I'm new to the whole world of tandems, I spent an inordinate amount of time researching "how it should be done". Sheldon Brown mentions controlling the rear drag/drum brake with a bar end shifter. This allows you to set it and forget it if you are descending a very large hill. I really liked the simplicity of this solution, and I had already experienced my wife braking when I was not expecting it when she had control over this. Being the control freak that I am, I determined that I would control all decelerating devices. Because I didn't want to clutter the handlebars, and because I thought it would be neato, I ordered a Paul Thumbie in 26.0 mm guise. I also bought a used set of Shimano barcons on eBay. Because I needed three shifters, I used the two that I had on my RB-T (and replaced them there with Riv's silky-smooth variety). While it's probably overkill to use a Thumbie in this situation, I think it's pretty slick, and it tucks nicely out of the way.
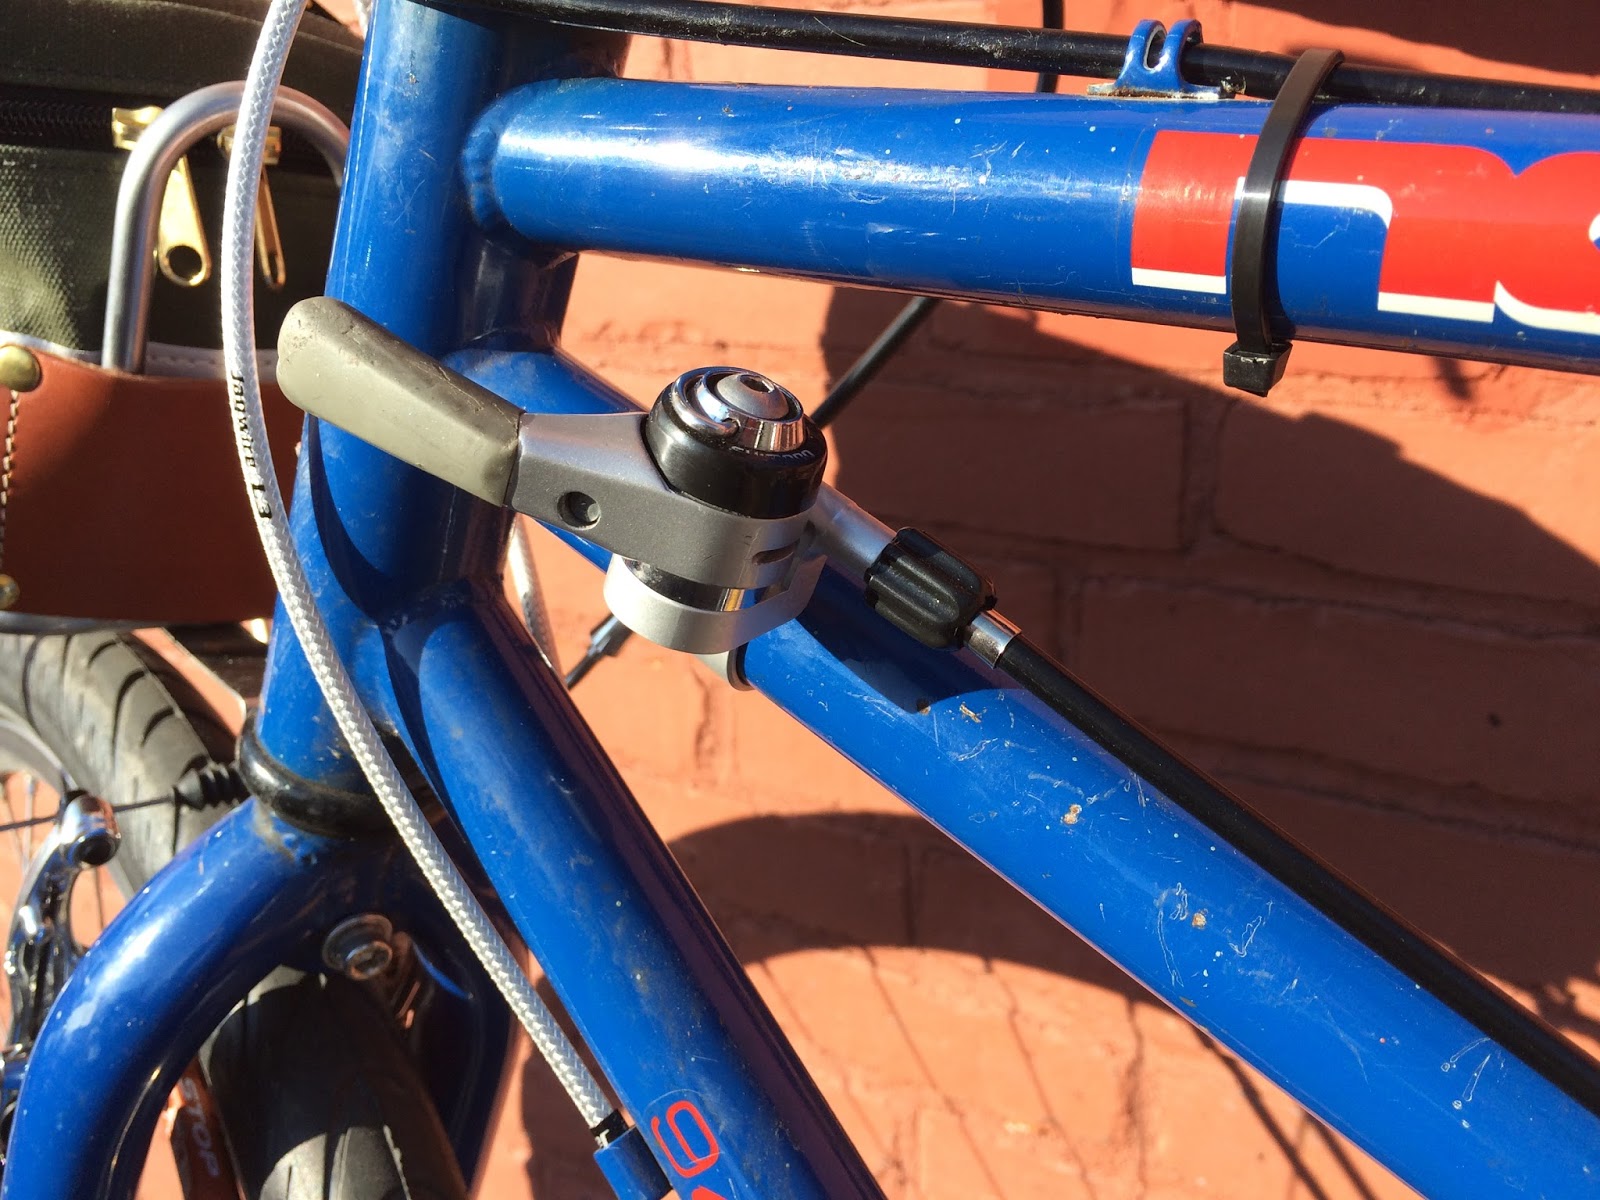 |
| The brake is engaged in this picture. Using a barcon allows you to have a parking brake, which is very handy with an unwieldy steed like a tandem. |
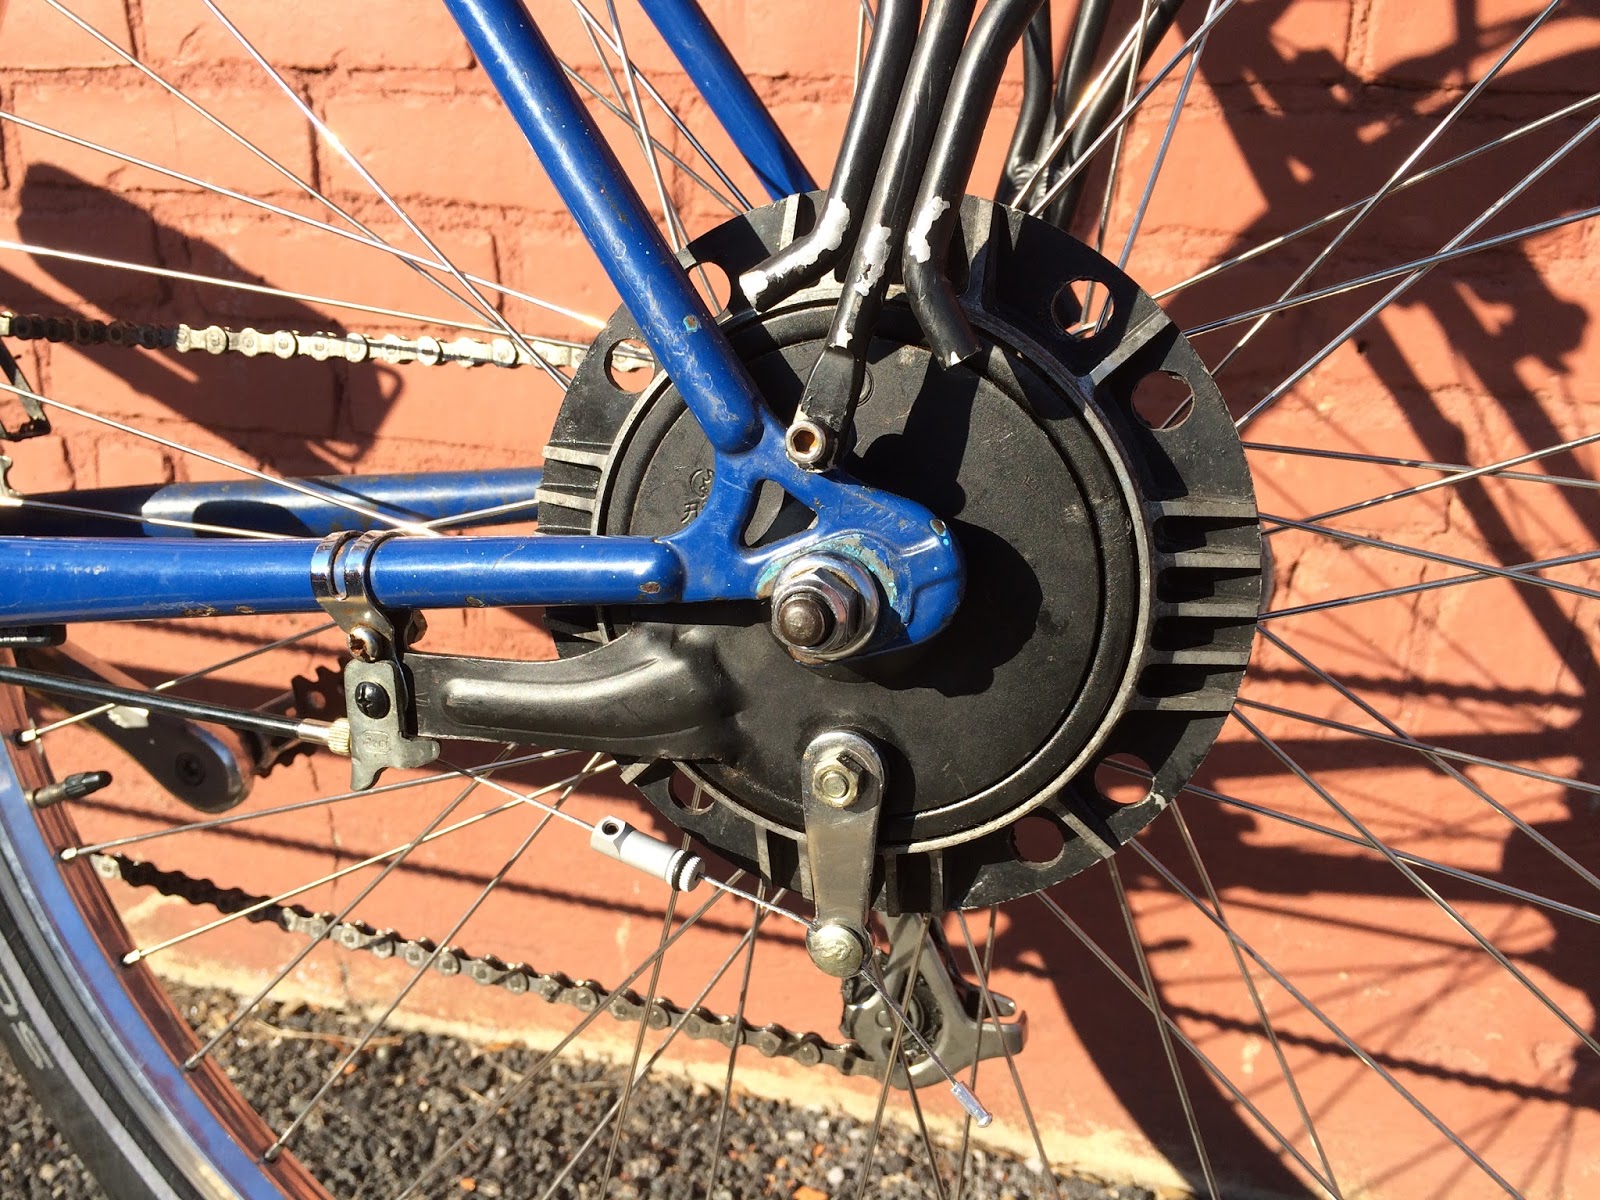 |
| The Ritchey Break-Away Quick Disconnect (DERAILER VERSION) is just to the left of the lever arm. |
I decided to install a Ritchey Break-Away Quick Disconnect, because removing the rear wheel was such an awful pain, and the cable was getting really chewed up at the lever arm on the Arai drum. I used the derailer version because I'm actually using derailer cable connected to a shifter (rather than brake cable connected to a brake lever). Very little force is required to actuate the drum, so I'm not very concerned about the loss of 0.1mm of cable thickness vs. a brake cable. I am however using brake cable housing, which seems like a no-brainer after it was pointed out to me by someone on the iBob list.
I replaced the cantilever brakes with Tektro mini-V's, and I pull Kool Stop pads on them (natch). I also ordered Jagwire adjustable noodles as all of the reviews I read of the brakes said they were a worthy addition (and cheap one at that at ~$4 each). The canti's were interfering with my racks, and I read that people liked them, so I figured why not. So far they've been great and they give me plenty of flexibility in pad placement despite the 27"->700c conversion.
 |
| I no longer need the cable hanger that is attached to the seatpost bolt, but I haven't removed it yet. |
Other details that are not particularly photo-worthy:
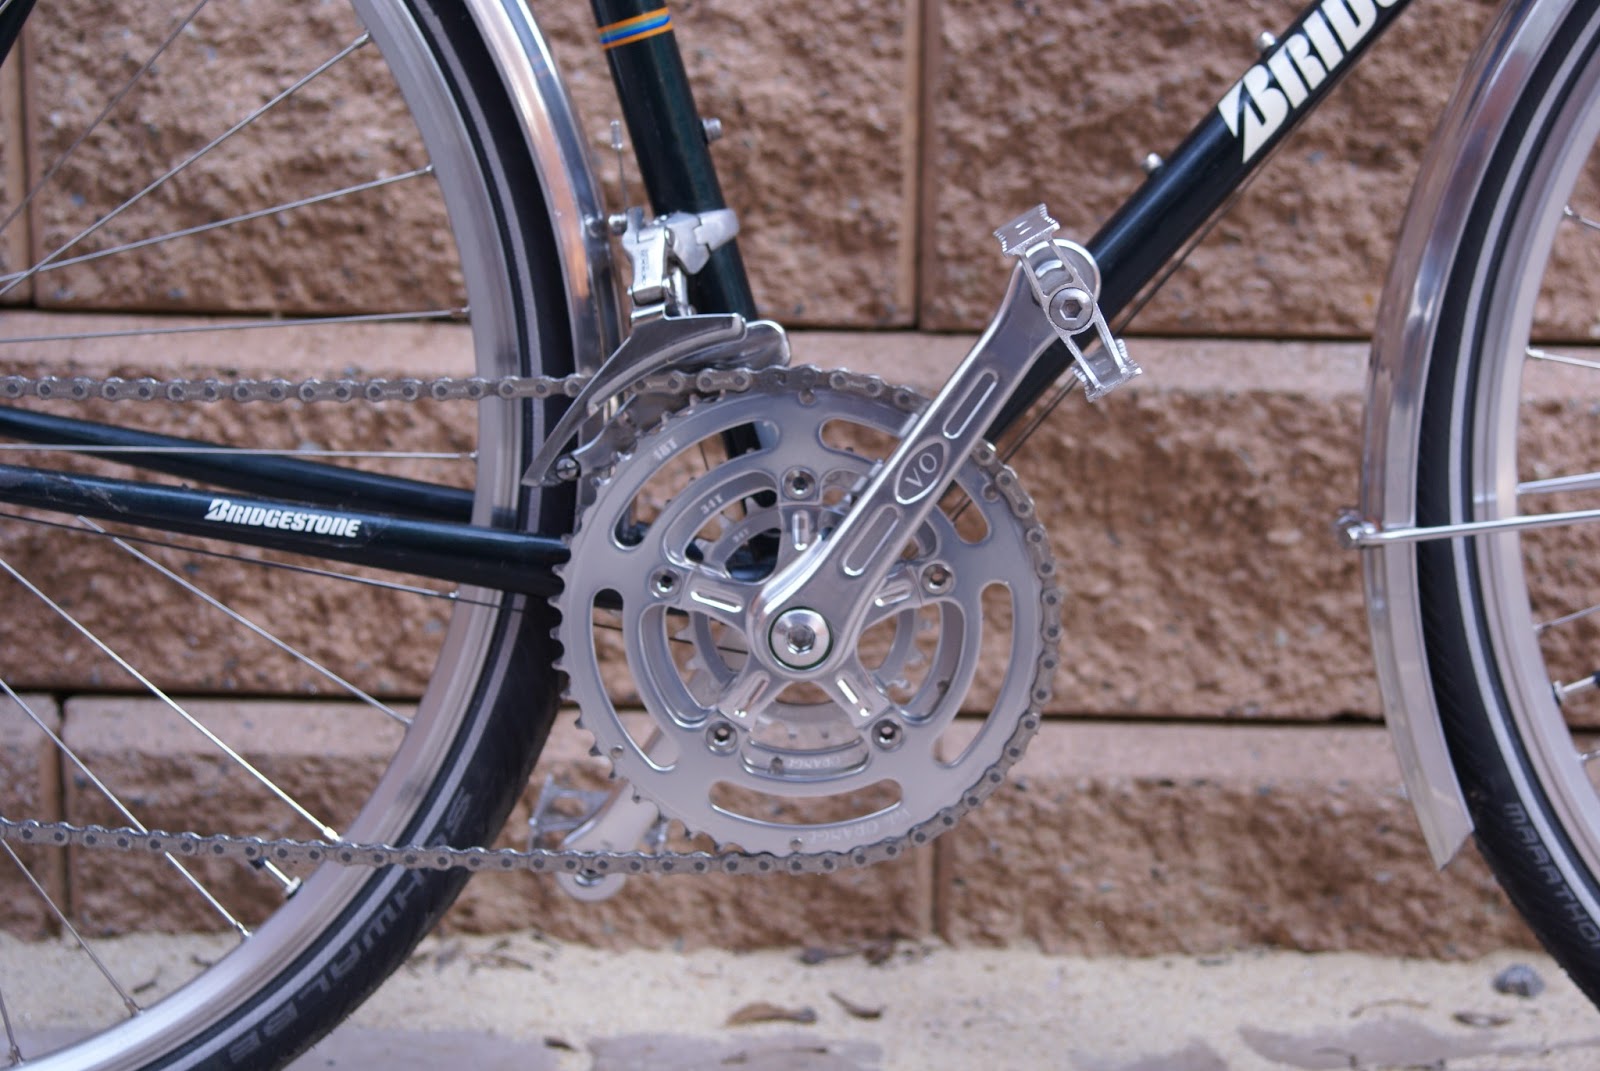
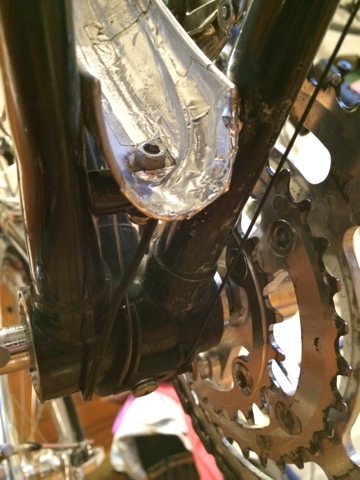
- Both bottom brackets were replaced with modern, sealed bearing variety. (I actually can't remember what I put in there, but I think they are VO).
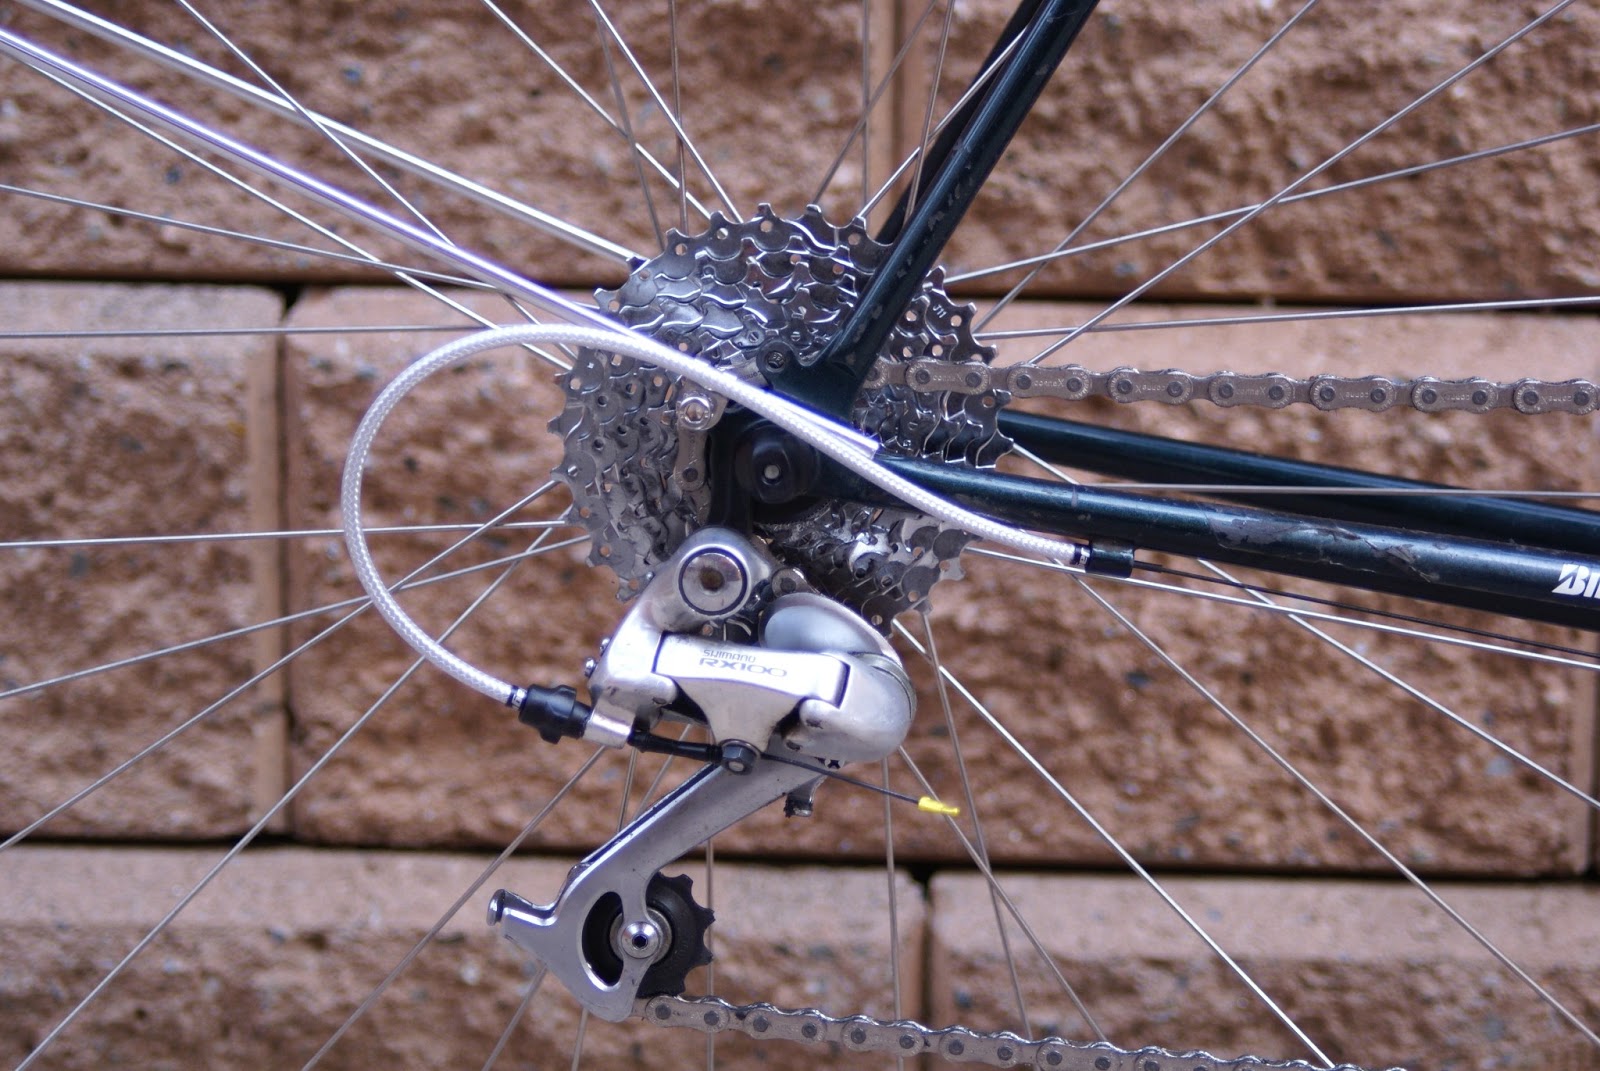
- I replaced the freewheel with a modern Shimano 7-speed
- The primary chain was replaced with a SRAM something-or-other
- Al housing and cables were replaced
- The original Suntour barcons were replaced with Shimano friction shifters. I've since learned that the Suntour barcons are relatively desirable. I don't know why, as I found them to be inferior to Shimano. I sold them on eBay. I also removed the Suntour cantilever brakes, as they no longer reached after the 700c conversion. I'm going to sell them, I just haven't yet.
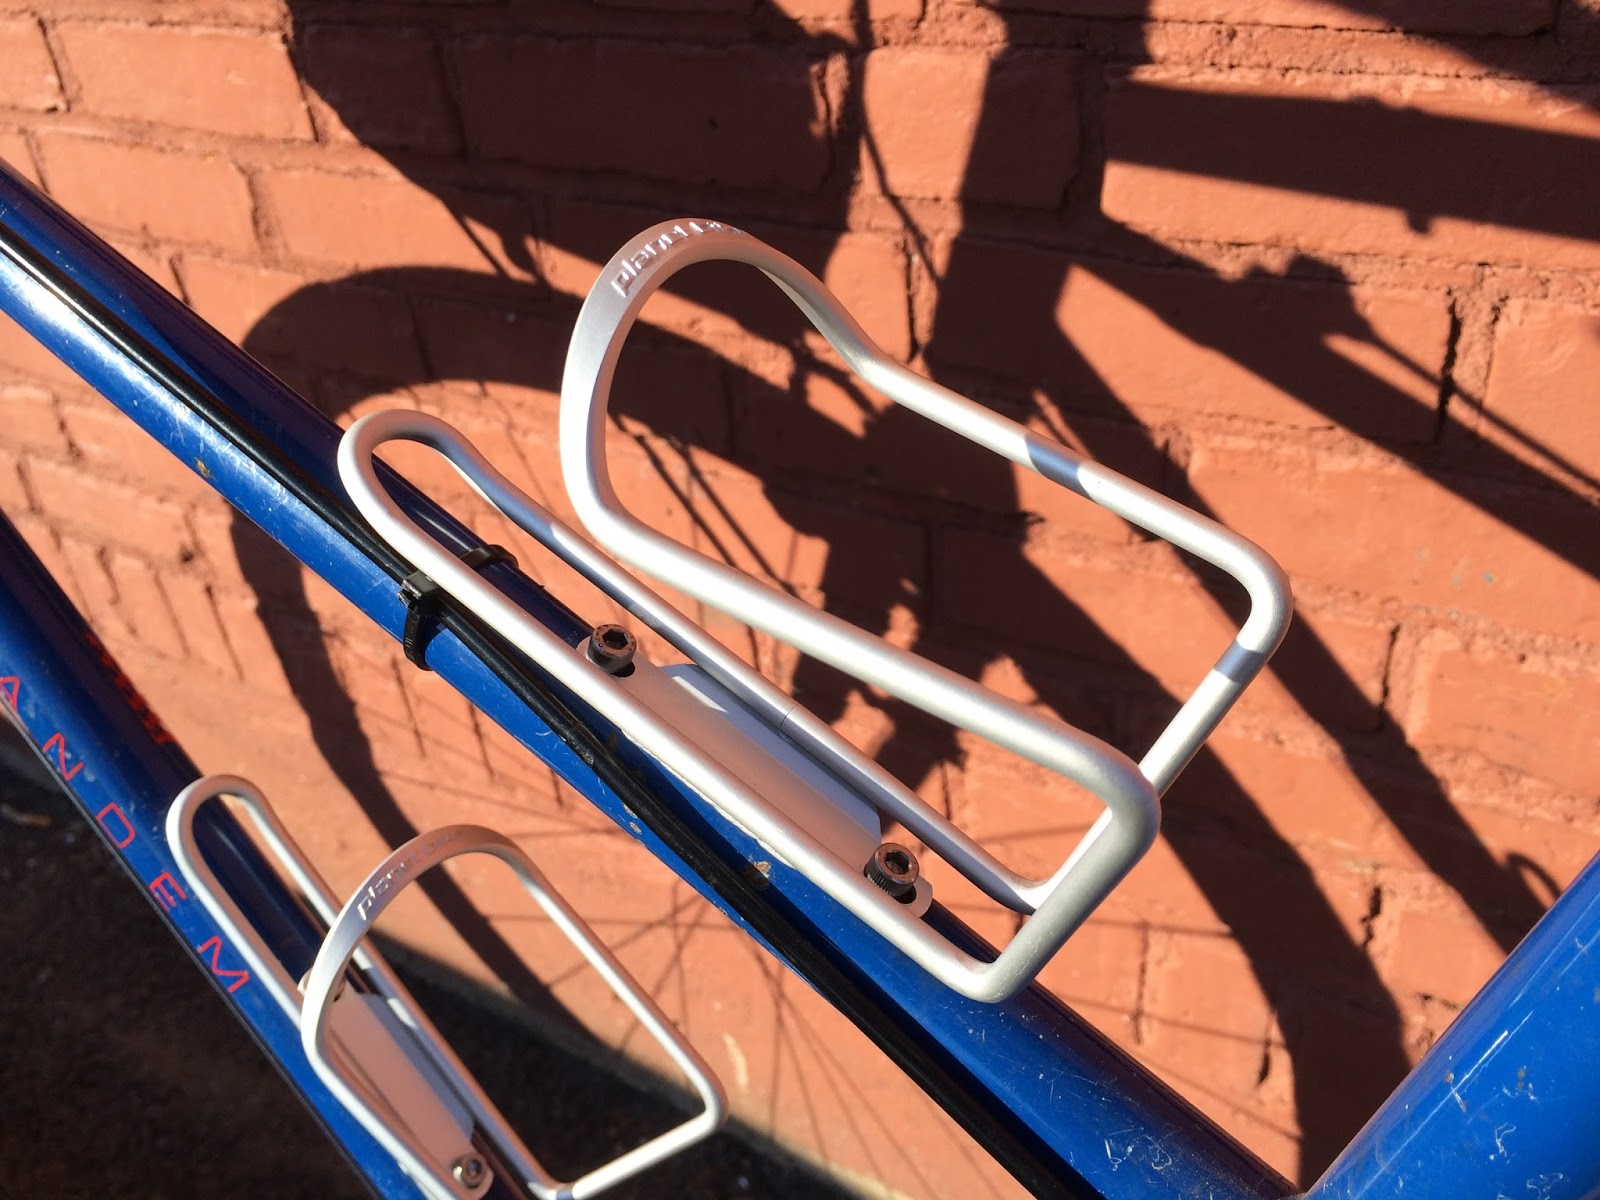
- I put on four generic silver aluminum bottle cages
- the pedals are constantly changing
- the original Suntour F&R derailers remain for the time being, as do the triple chainrings.


I would be remiss if I did not thank the wonderfully helpfull people on the Internet Bridgestone Owner's Bunch (iBob) list. It's the perfect place to get advice on a project like this.
We're ready for rando season!
Hope to see you at some NER events this spring, and hopefully at PBP 2015...


.JPG)
.JPG)


.JPG)