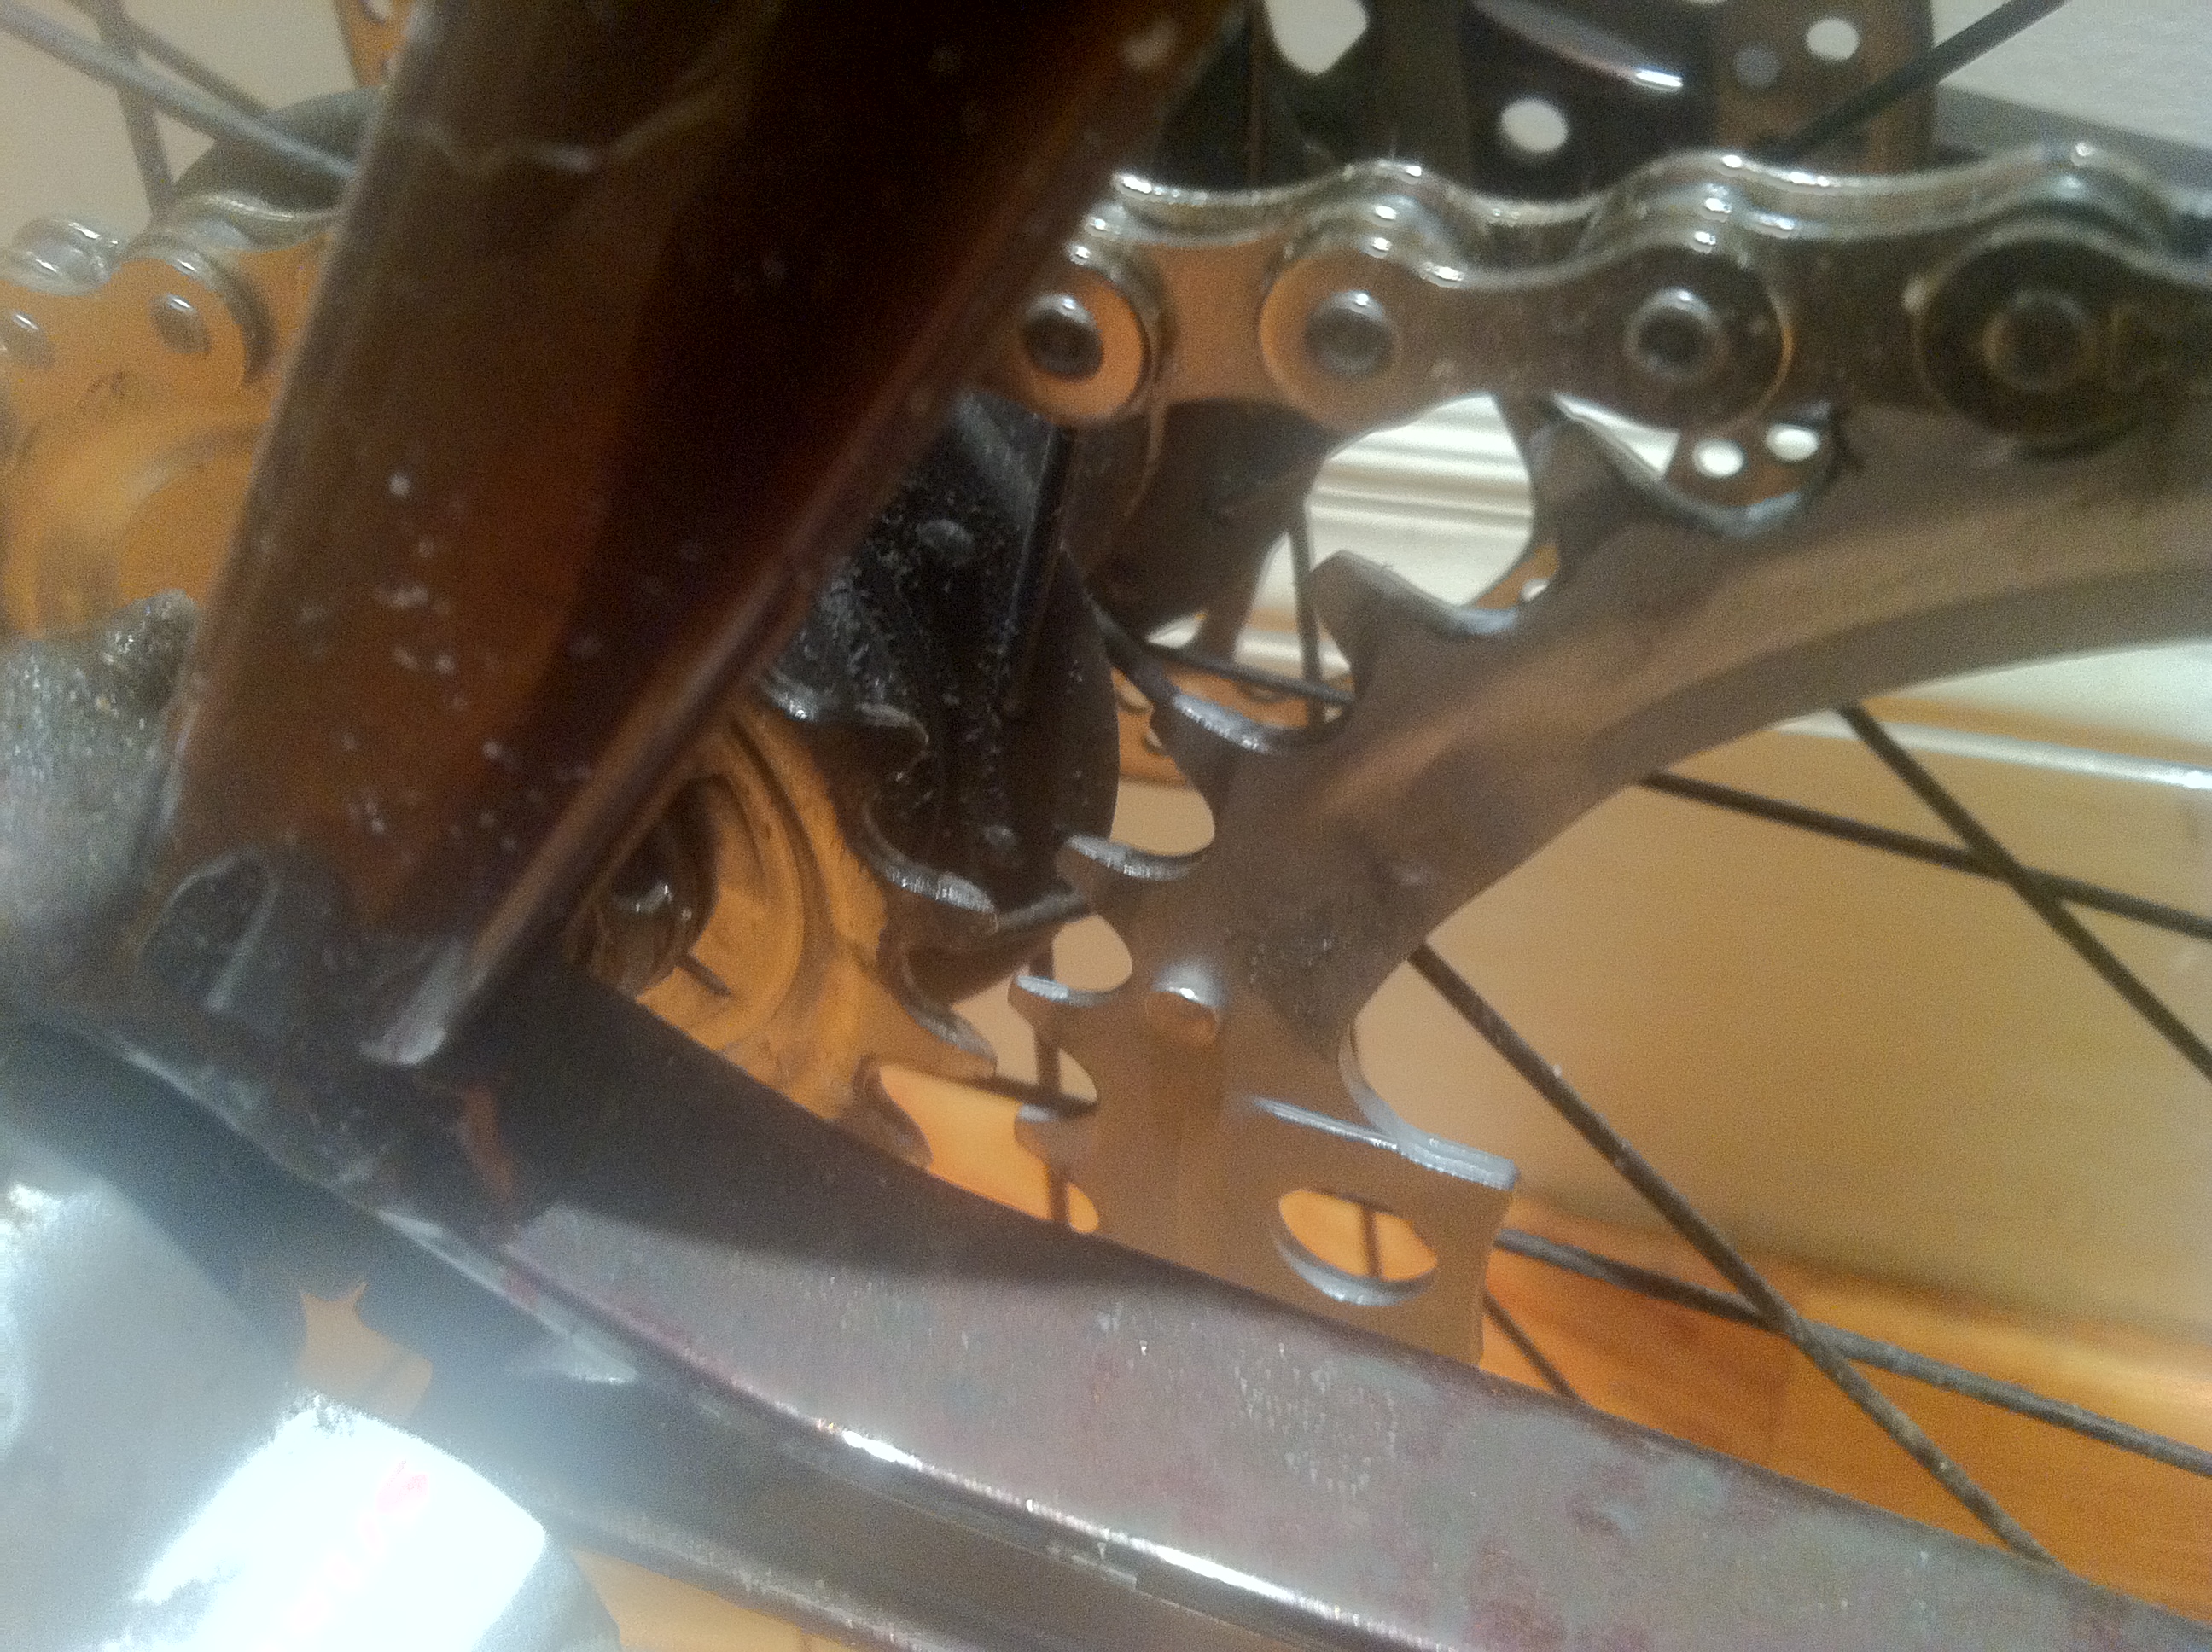
37 Tooth Ghostring
This weekend I finally solved a particularly tough chain tension problem that I’ve been having on my winter commuter/guest bike with the addition of a “ghostring” or “ghost ring” or “ghost chainring” (I’m unsure of what the proper name for it is, if there is one). The idea is simple, but when first presented with it any well-seasoned cyclist will surely look askance at the contraption. I’m here to say: so far, so good!
A little background: I purchased the bike, a Felt XCity 3 off CL this winter, as it exactly fit my criteria for an ideal winter commuter bike: it has a Nexus 3-speed internal hub, disc brakes, generous toe clearance so that there is no toe overlap with heavy boots, clearance for wide tires (I put on 700x35c Schwalbe Marathon Winter studs that fit under the included fenders), it is aluminum so I don’t have to worry about the frame rusting from road salt, and it was relatively cheap. The main problem is that the previous owner was a bit of a hack at bicycle mechanics (apologies to the previous owner if by chance you read this blog, but you must know it’s true), and he managed to let rust or strip-out nearly every bolt on the bike. Most importantly, the two tiny bolts that are on the underside of the bottom bracket were seized in the BB shell. The purpose of these two bolts is that they are what allow for the adjustment of the eccentric BB which in turn is what allows for an adjustment of chain tension. To make matters worse, in attempting to remove one of the bolts, I snapped a 3mm hex key in the bolt, and now it’s really not coming out. Because this bike has vertical dropouts, the eccentric BB was originally the only option for adjusting chain tension. After a ton of back-and-forth with the people at Felt in California, they scrounged up a replaceable dropout that included a derailleur hanger in the hope of being able to install a standard pulley chain tensioner. However, because of the shifting mechanism of the Nexus hub, there is not enough clearance to mount the device.
The Nexus shifting mechanism doesn't provide enough clearance to the derailleur hanger
Because I view this bike as a beater (albeit a nice beater) I’ve been hoping to avoid spending a bunch of money on it as I only plan on riding it 3 or 4 months out of the year. If this were not the case I found these snazzy eccentric bottom brackets for tandems that would appear to do the trick, but they are $120 and it would involve me taking a chance on hammering the existing BB out of the frame one I removed the cranks.
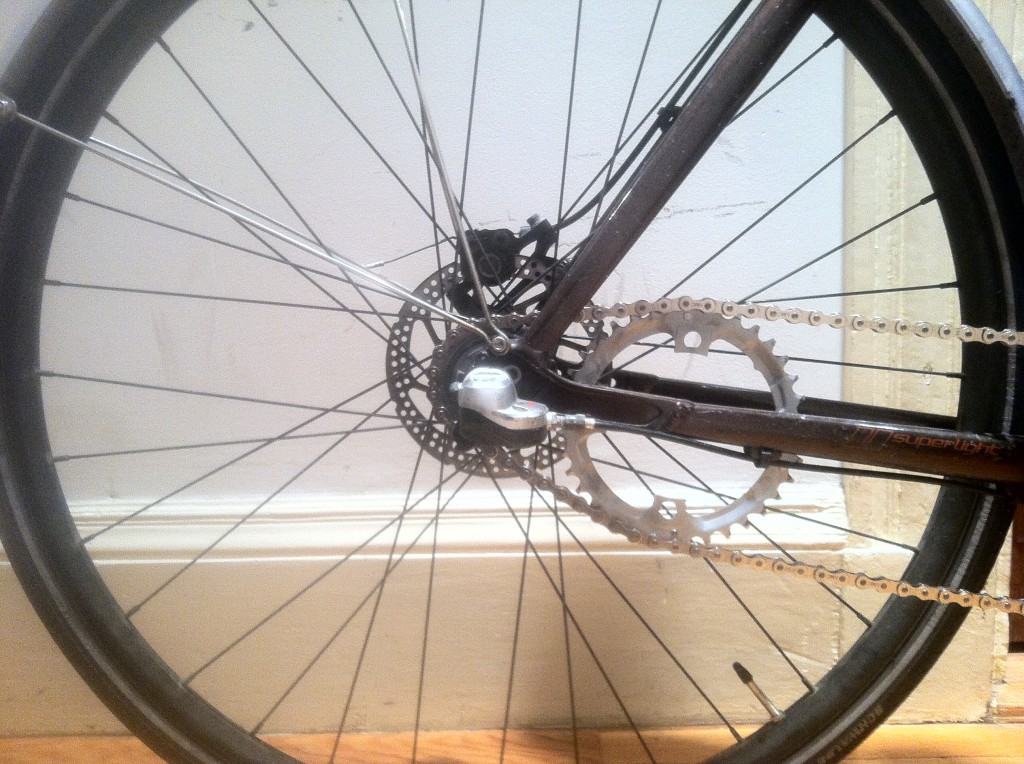
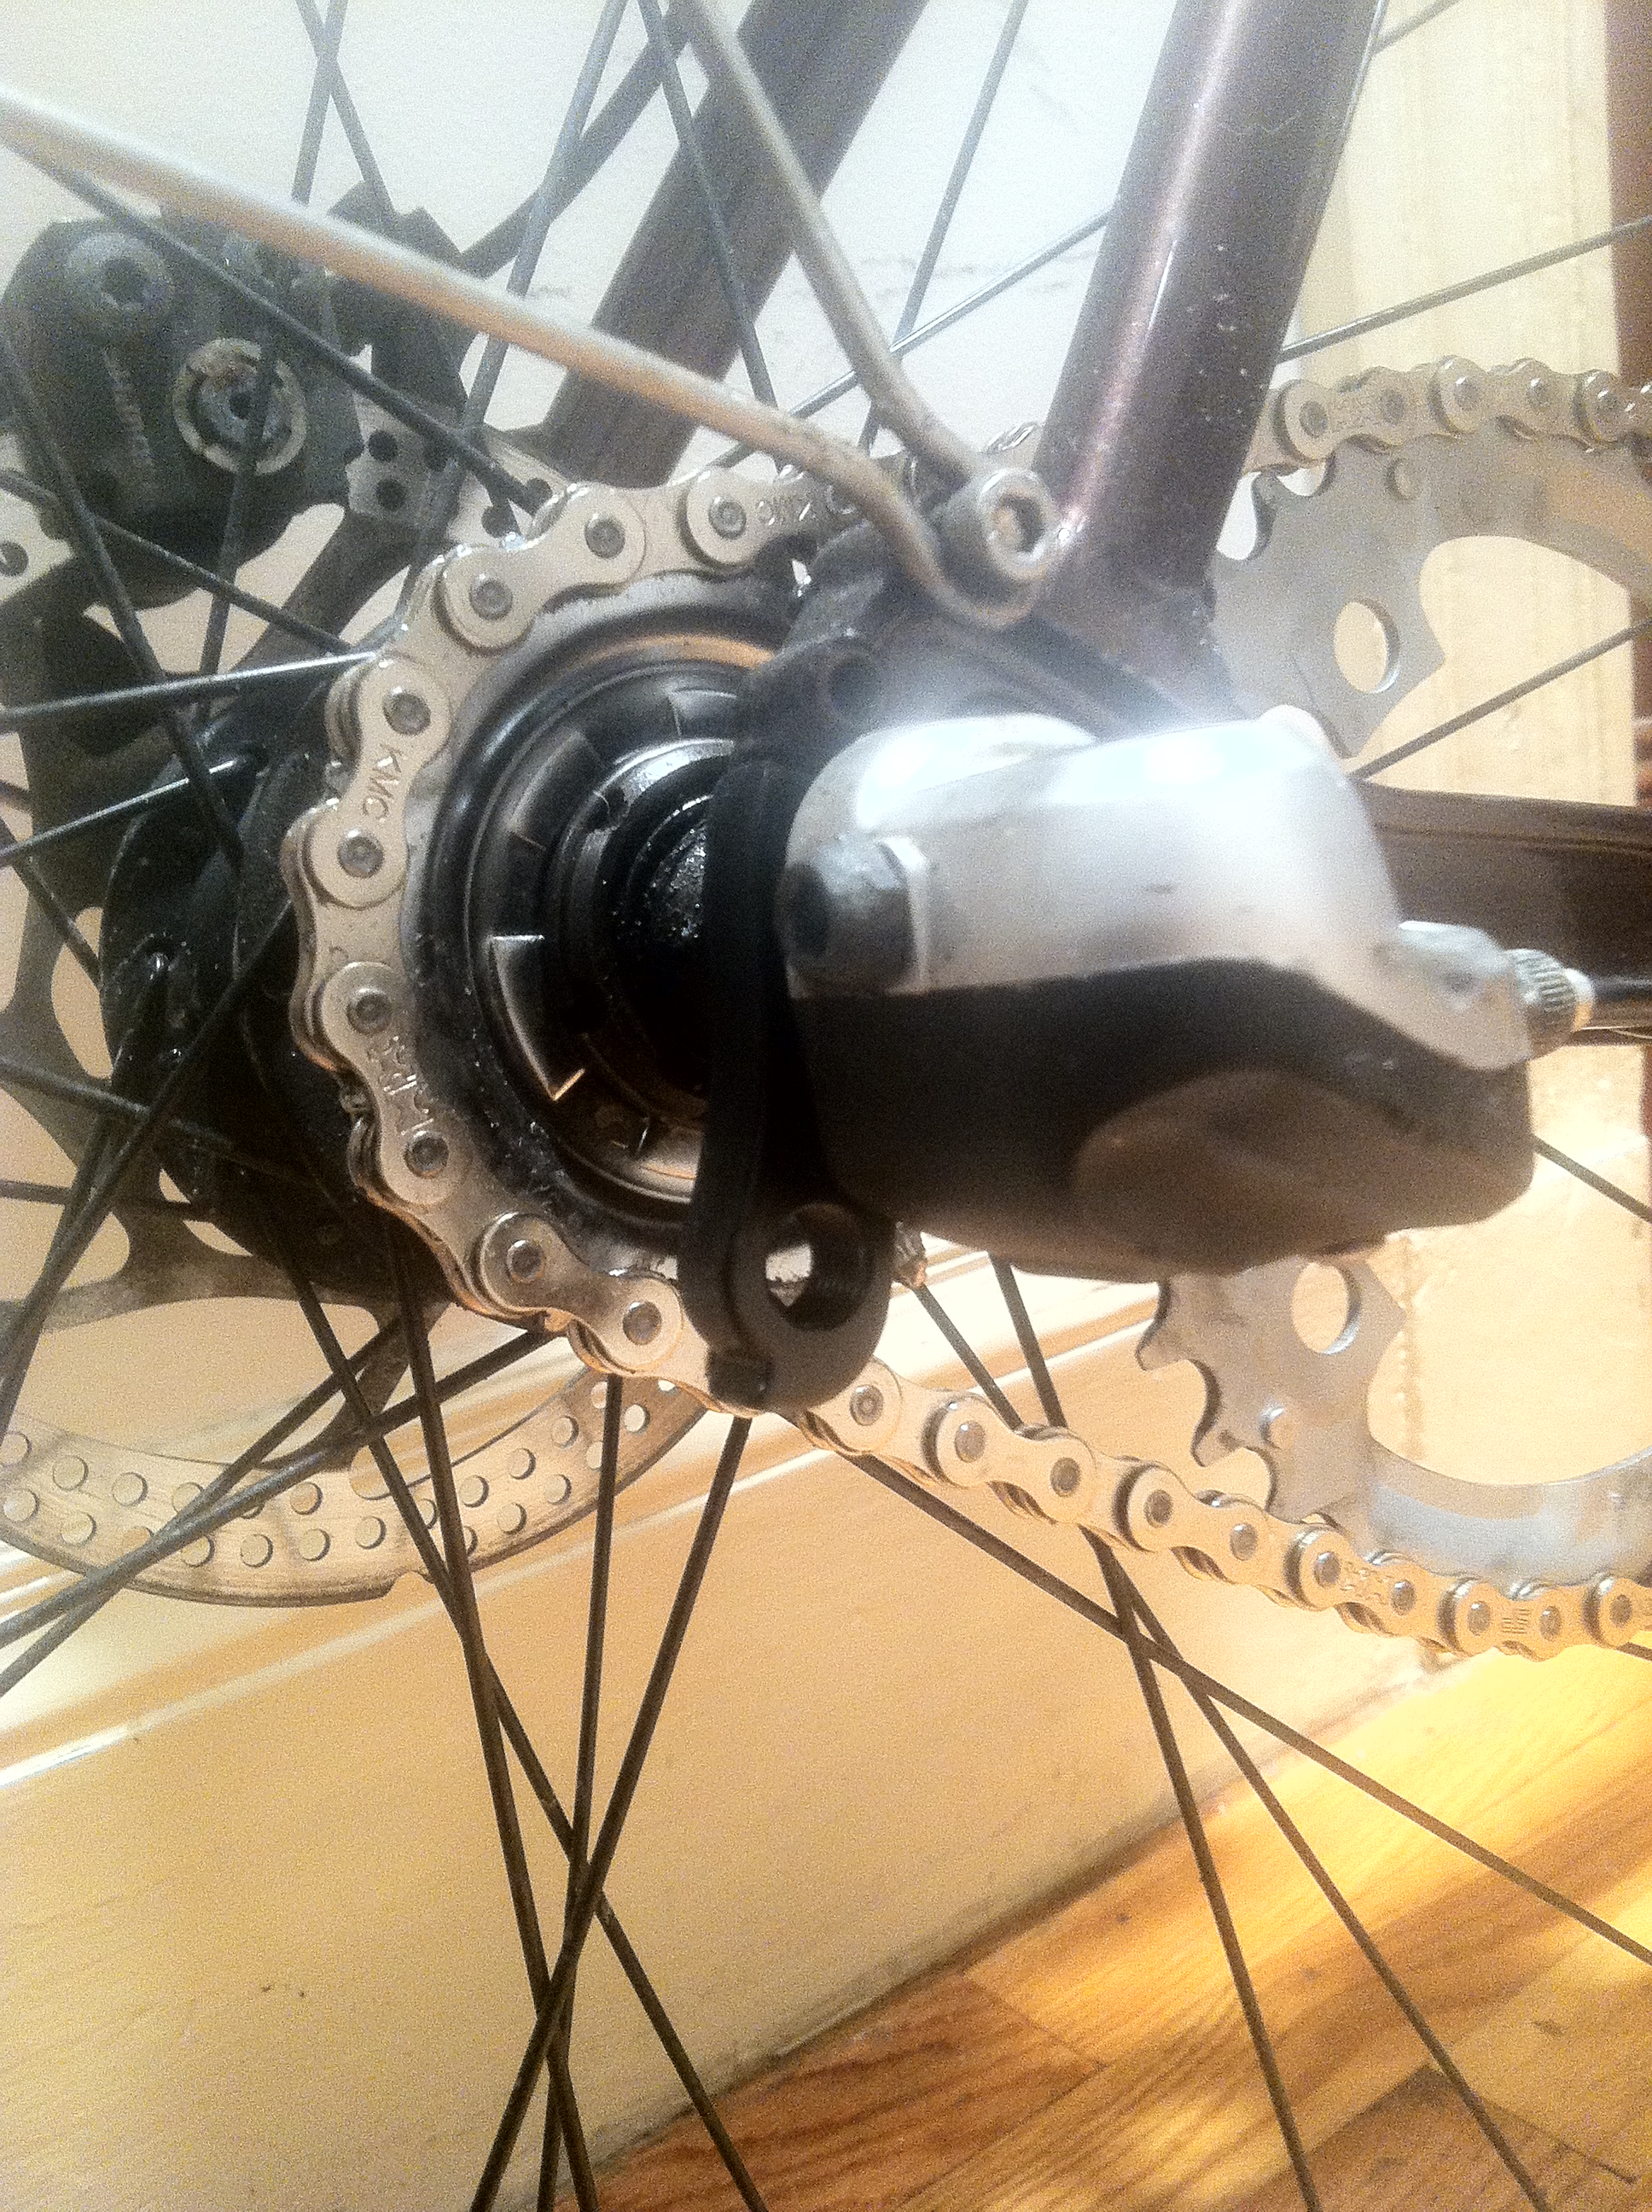
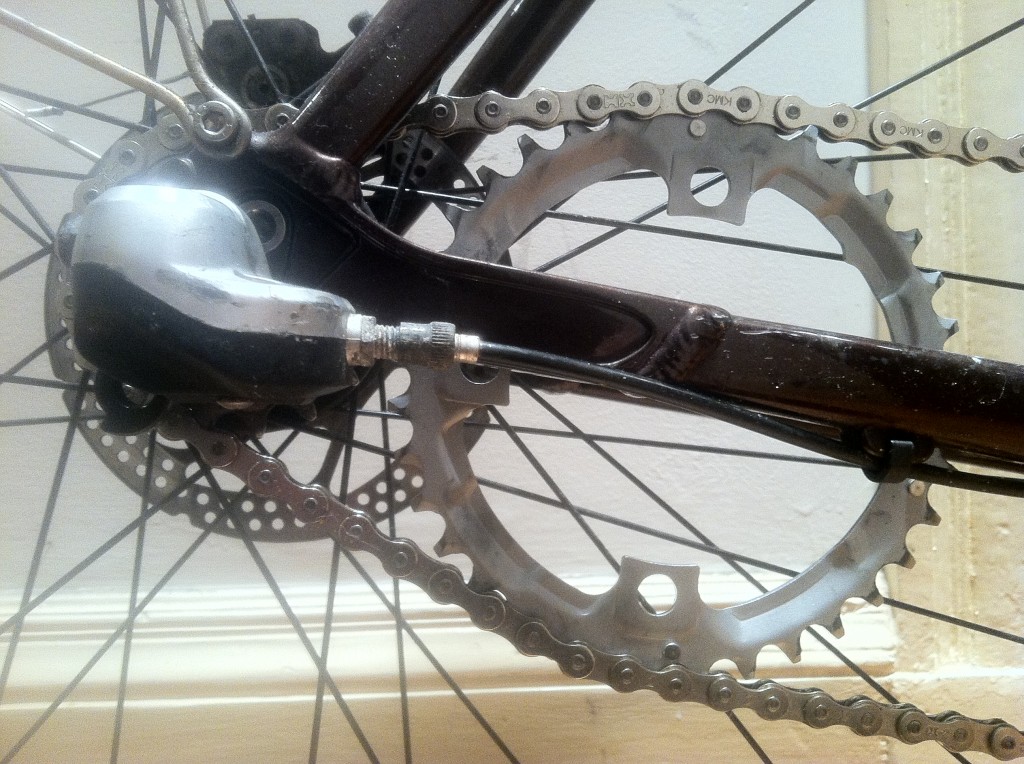
After a lot of searching around on the internet (way more drivetrain-related forum posts on random bike blogs around the world than I would care to remember) for solutions, I came across the ghostring. The idea is that you place an extra chainring in the middle of the drivetrain that serves to tension the chain. Because the chain is going at the same speed in both directions, the chainring does not move fore or aft so long as it is in there tight, it just rotates with everything else. It’s one of those things that one needs to see to believe. The mechanics at Bikes Not Bombs were highly skeptical of the idea when I went in this weekend, but they humored me in bringing out a whole bunch of variously-sized chainrings so that I could find the right one. After getting the chain as short as I could (including the addition of a half-link) I settled on a 36 tooth for the ghostring. I could probably get away with a 37 or maybe even a 38 to get the chain ever tighter, but I would then run into the problem of the ghostring rubbing against the chainstay. Plus, as it is right now, there is an ever so slight rubbing of the tips of the teeth on the ghostring with those on the rear cog. It’s a very slight clicking that I assume will go away when the harder steel cog wears down the softer teeth of the aluminum ghostring. If this were on a fixed gear I might be a little bit more concerned about the rubbing, but in this case I don’t think it’s going to matter.
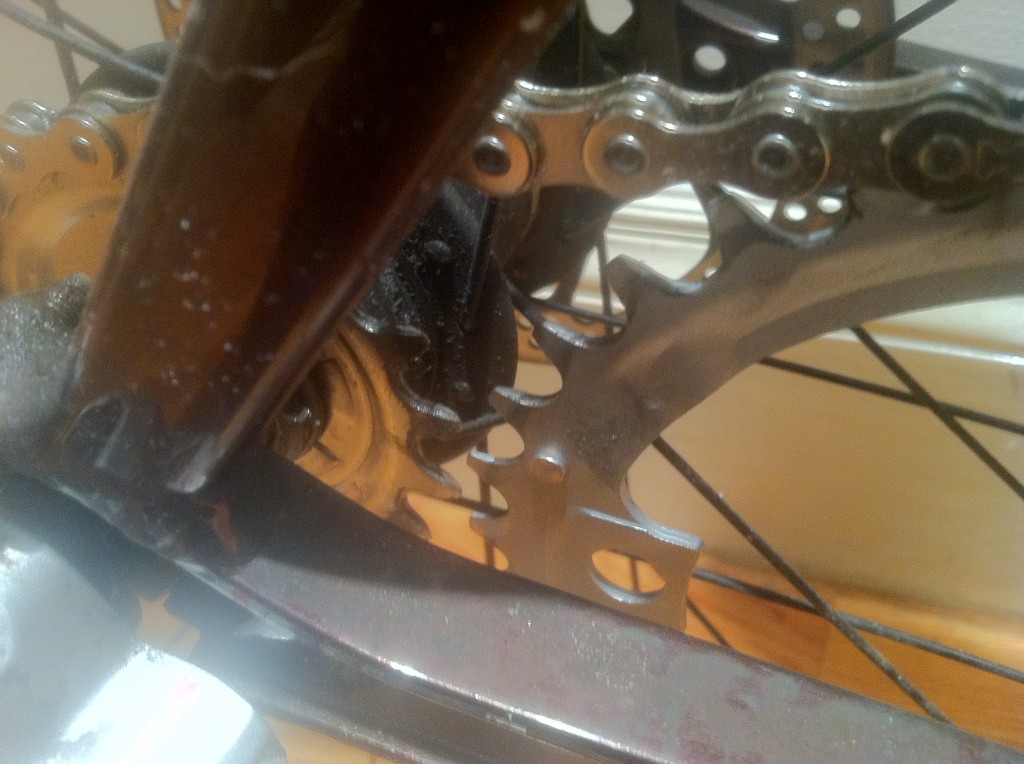
Super tight clearance between ghostring and cog
It worked flawlessly on my ride home and whenever I have a friend in town that needs to borrow a bike it will get tested further. I’ve swapped out the studded tires (for Marathon Plus 28c’s that I had lying around) for the warm months. Otherwise it will have to wait until next winter for the true test. Do you have any experience with this franken-solution? Thoughts?
Closeup of the ghostring (apologies for the crappy iphone photo)